[HAI5016] Gemini API Quickstart

This week, let’s put our Google Cloud API credits to use. We’ll explore the Gemini API, Google’s large language model (LLM), and we’ll do so in GitHub Codespaces, a cloud-based development environment that lets us code directly in the browser.
Disclaimer: This blog provides instructions and resources for the workshop part of my lectures. It is not a replacement for attending class; it may not include some critical steps and the foundational background of the techniques and methodologies used. The information may become outdated over time as I do not update the instructions after class.
(re)Opening a GitHub Codespace
To (re)open your GitHub Codespace, follow these steps:
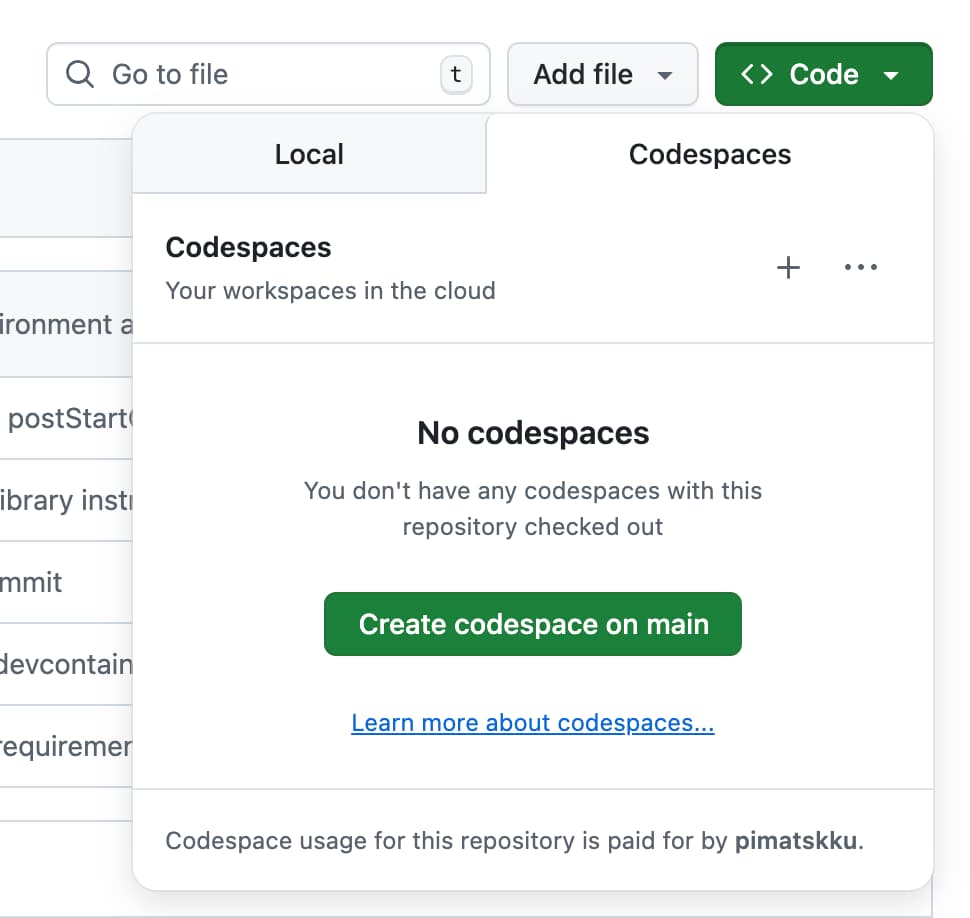
- Go to the GitHub repository you forked in the previous class (or fork it now from PimOps/HAI-5016-DC)
- Click on the green
Codebutton. - Select the
Codespacestab. - If you don’t already have one, click
Create codespace on main.
Save the Google Cloud API Key as a Secret in the .env File
- In your Codespace, create an
.envfile in the root directory of your project and add:1
GEMINI_API_KEY=your_api_key_here
- Go to the Google AI Studio
- Go to
API Keys - Create a new API key if you haven’t done so already
- Copy the API key to your clipboard
- Go back to the
.envfile and replaceyour_api_key_herewith the actual API key you copied. - Save the file. (Files in Codespaces save automatically.)
Double check if your .env is not being tracked by git by looking at the
.gitignorefile
Install Required Python Packages
There are several ways to install a Python package into our environment. In this session, we’ll use UV and the requirements.txt file from the repository for consistency and practice.
According to the Gemini API Quickstart, we need to install the google-genai package to interact with the Gemini API.
- In your Codespace file explorer, find and double click the
requirements.txtfile - Add the following line into the file:
1

google-genai
- Save the
requirements.txtfile - Open the terminal in your Codespace (you can do this by clicking on “Terminal” in the top menu and selecting “New Terminal”)
- In the terminal, run the following command to install the packages listed in
requirements.txt:1
uv pip install -r requirements.txt
This will install the google-genai package along with any other packages listed in the requirements.txt file if not already installed.
Commit and Push Changes to your repository
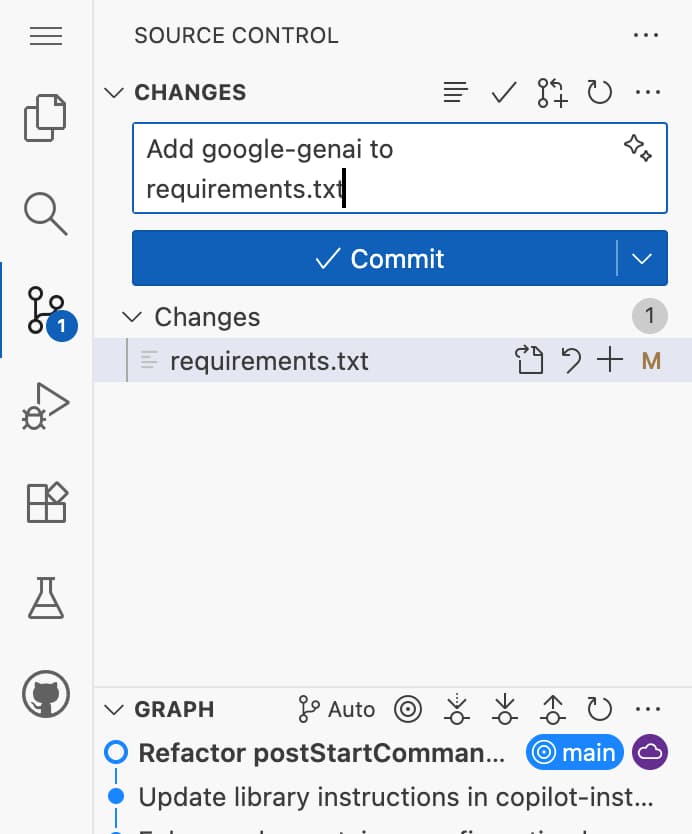
If this is all successful, let’s add a commit to save these changes to our repository:
- Find the “Source Control” icon in the left sidebar of your Codespace (it should show a number indicating the number of changes)
- Check if the
requirements.txtfile is listed under “Changes” - Enter a commit message in the text box (e.g., “Add Google GenAI package”)
Tip: Use the Copilot button to generate helpful commit messages.
- Click the dropdown arrow next to the checkmark icon and select “Commit and Push”
Your first Gemini API call
Let’s create a Python script to interact with the Gemini API, using the the make your first request example from the Gemini API Quickstart guide.
- In the Codespace file explorer, click on the “New File” icon
- Name the file
gemini_api.py - Open the newly created Python file
- Copy and paste the following code into the file:
1
2
3
4
5
6
7
8
9

from google import genai

# The client gets the API key from the environment variable `GEMINI_API_KEY`.
client = genai.Client()

response = client.models.generate_content(
    model="gemini-2.5-flash", contents="Explain how AI works in a few words"
    )
print(response.text)
- Save the
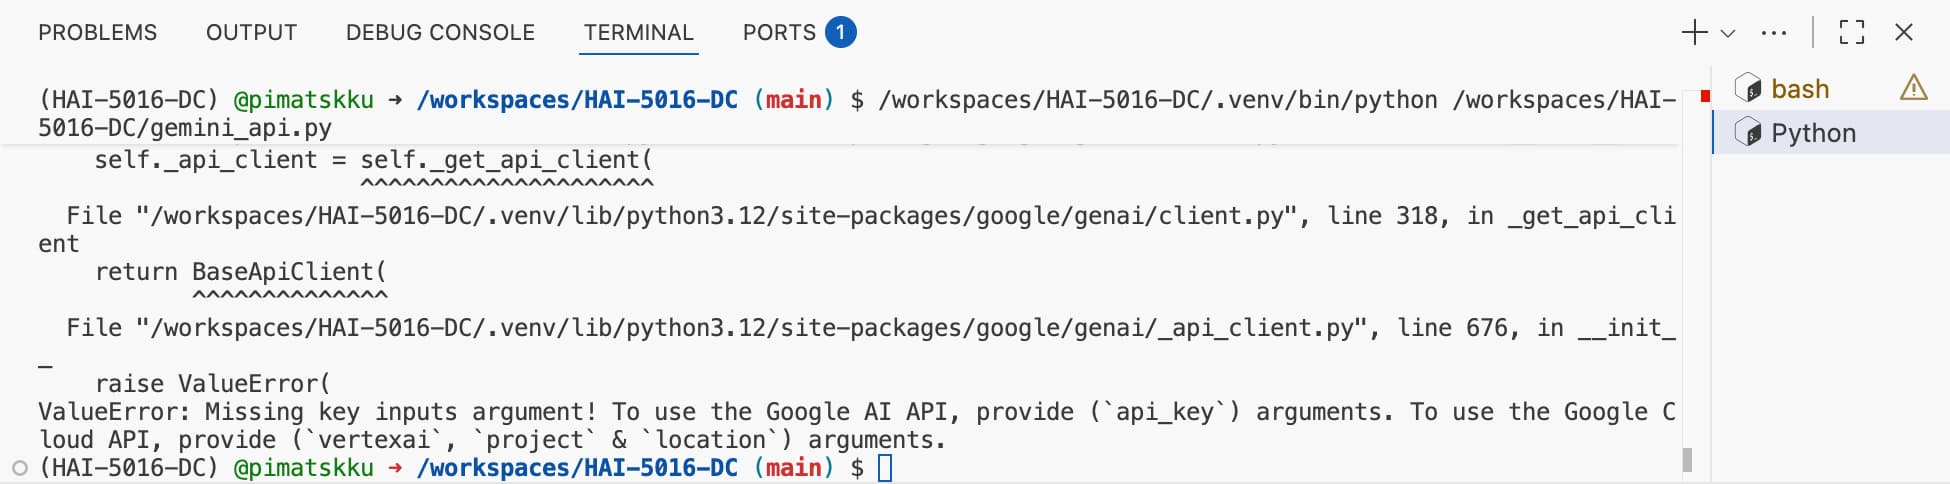
gemini_api.pyfile - Run the script by clicking on the “Run” button at the top right of the editor
Oops, an error!
You’ll likely see an authentication error. This happens because the environment variables from your .env file aren’t being loaded automatically.
 Python being Python
Instead of fixing it using our brain, let’s ask Copilot for help!
-
Press the magic command
Ctrl+Shift+P(orCmd+Shift+Pon Mac) to open the VS code command palette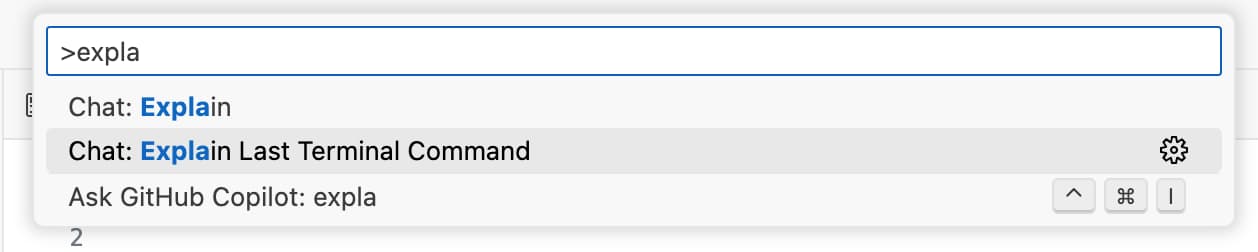 The magical ctrl+shift+p menu
 - Find the
Explain Last Terminal Commandcommand and select it - A new tab will open with GitHub Copilot in ask mode with an explanation of the error message
-
Read the explaination (haha), find the code suggestion to load environment variables from the
.envfile and click theApply in editorbutton Apply in editor
 - If VS Code asks you where to apply the changes, select your current file:
gemini_api.py
Based on our requirements.txt and custom instructions, Copilot should suggest us to use the python-dotenv package to load the environment variables from the .env file. Let’s follow its suggestions and press Keep.
 Looks familiar? Green = added, Red = removed
If it doesn’t, you can manually add the following code to the top of your gemini_api.py file:
1
2
3
4

from dotenv import load_dotenv
import os

load_dotenv()
Then save and rerun the script. You should now see a valid response from the Gemini API in your terminal!
If this was successful, don’t forget to commit and push your changes to your repository!
Next Steps
Let’s experiment further with Copilot and the Gemini API. For example, try building a simple chatbot that generates responses to user input. For ideas, explore the Gemini API - Text generation examples in the official documentation
Some examples of how to use Copilot for this can be found on the blog that I wrote for the GitHub LLM Crash Course seminar last year.
- Try to add code to your existing
gemini_api.pyby using:-
Ghost text suggestions by just start typing, or prompt it with comments like
1

# Make a loop that asks for the user's input and sends it to the model until the user types 'exit' -
Inline Chat by selecting a block of code and pressing
Ctrl+I(orCmd+Ion Mac) to ask Copilot questions about the selected code.Did you know that Inline Chat also works in the terminal? Try selecting an error message and pressing
Ctrl+I(orCmd+Ion Mac) to ask Copilot for help explaining or fixing it! - Chat with Copilot by opening the Copilot Chat pane in the sidebar and use edit mode to add history/context to the chatbot, or to have it tune the system prompt.
-
Ghost text suggestions by just start typing, or prompt it with comments like
Don’t forget to commit and push your changes to your repository regularly!
Homework
In the coming classes we may go hands-on with the context7 MCP server to assist us with coding using the latest documentation and code examples straight from the source. Because some MCP servers feel at best in a Docker container, please try to install Docker Desktop in your local machine before the next class: