[HAI5016] Lucky Context7 (MCP)
After today’s presentations, and in preparation for our next class, we’ll explore how to use MCP servers in Visual Studio Code.
We’ll focus on the Context7 server by Upstash, which gives our AI coding assistant (like Copilot) access to the latest, accurate documentation and code examples for popular libraries and frameworks like Pandas, LangChain, Supabase, and Google’s Gemini API.
Disclaimer: This blog provides instructions and resources for the workshop part of my lectures. It is not a replacement for attending class; it may not include some critical steps and the foundational background of the techniques and methodologies used. The information may become outdated over time as I do not update the instructions after class.
There are several ways to set up and use MCP servers in VS Code. I’ve outlined three methods below. We will select one of these for our in-class workshop, but you are welcome to explore all of them to your convenience.
- Option 1: Add a remote MCP server to our local VS Code (easiest)
- Option 2: Install Context7 MCP server in GitHub Codespaces via Node.js and npm
- Option 3: Install Context7 MCP server locally using Docker
Then: Try out the Context7 MCP server with Copilot
Option 1: Add a remote MCP Server to our local VS Code
The easiest way to get started is by adding a remote MCP server. This requires no local installation; you simply connect to an existing server on the internet.
- Open the command palette in VS Code by pressing
Ctrl + Shift + P(orCmd + Shift + Pon macOS). -
Find
MCP: Add serverand select it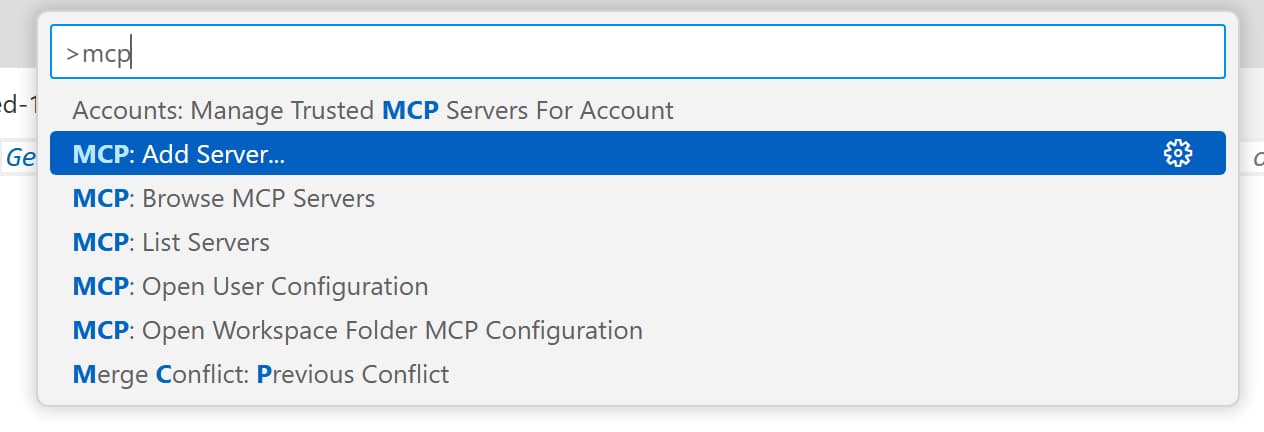
-
Find the
HTTPoption and select it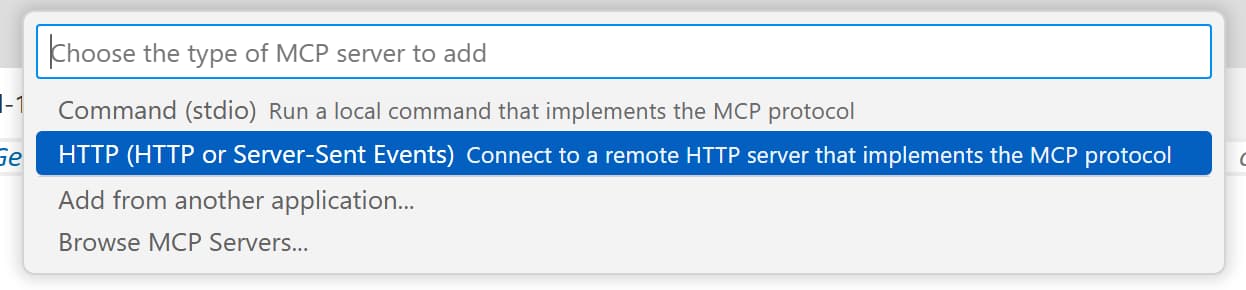
- When asked for an URL of the remote MCP server, enter:
https://mcp.context7.com/mcp - When asked to enter a name for the server, enter:
Context7 Remote - When asked for a configuration target, select
Global(Available to all workspaces)
This should open a file called mcp.json in a new tab in VS Code, containing the configuration for the remote MCP server you just added. Its content should look like this:
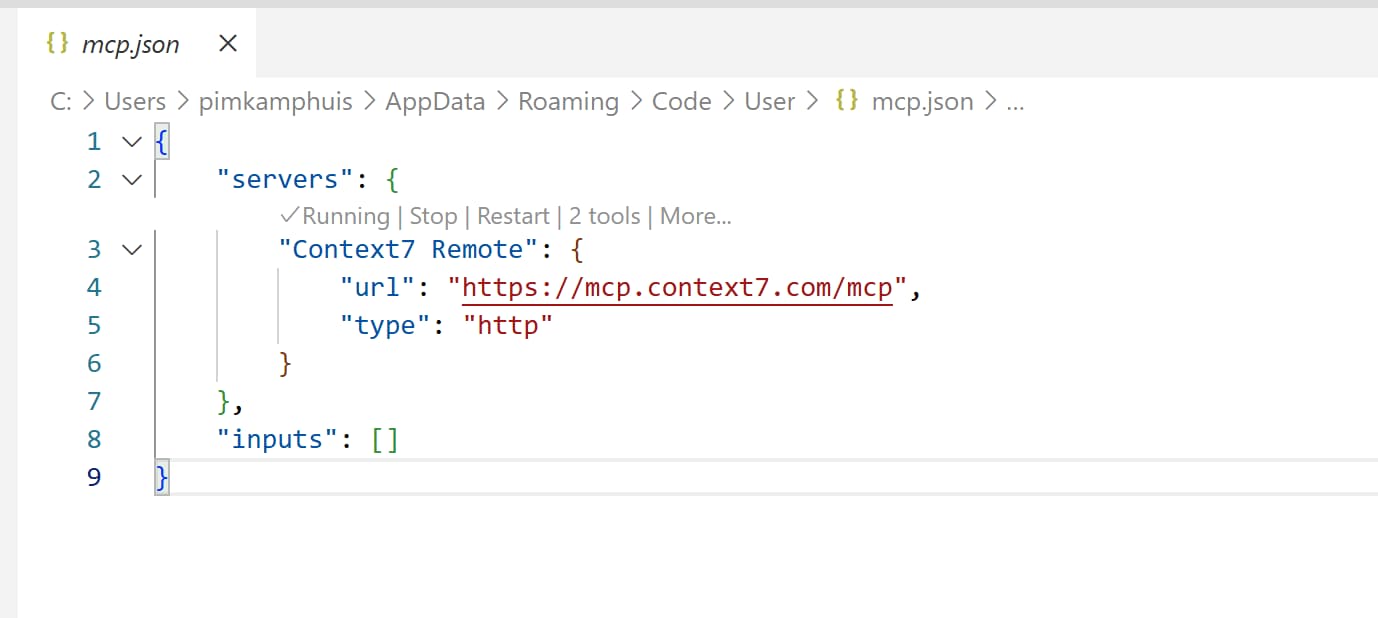 mcp.json file containing the Context7 Remote MCP server configuration
- Save and close the file.
Check if the Context7 Remote MCP server is running
Before we proceed, let’s check if the server is running:
- Open the command palette in VS Code by pressing
Ctrl + Shift + P(orCmd + Shift + Pon macOS). -
Find
MCP: List Serversand select it.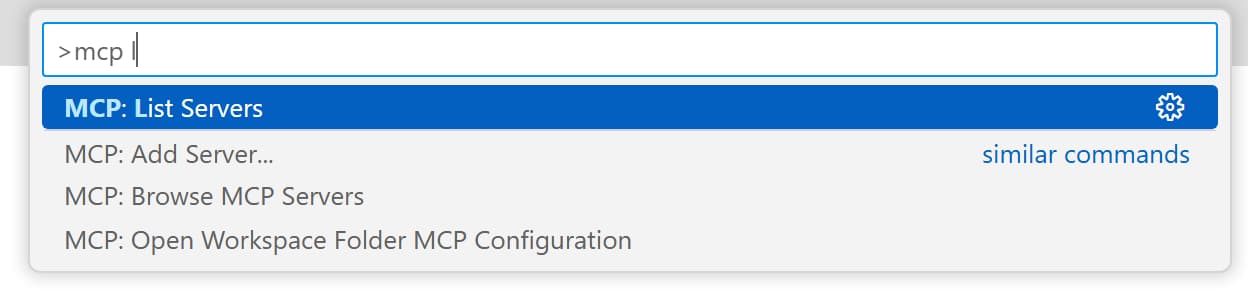
-
In the list of MCP servers,
Context7 Remoteshould be there. Check if it’s running.
If this is marked as running, you’re all set! Let’s try using it with Copilot below.
Option 2: Install Context7 MCP server in GitHub Codespaces via Node.js and npm
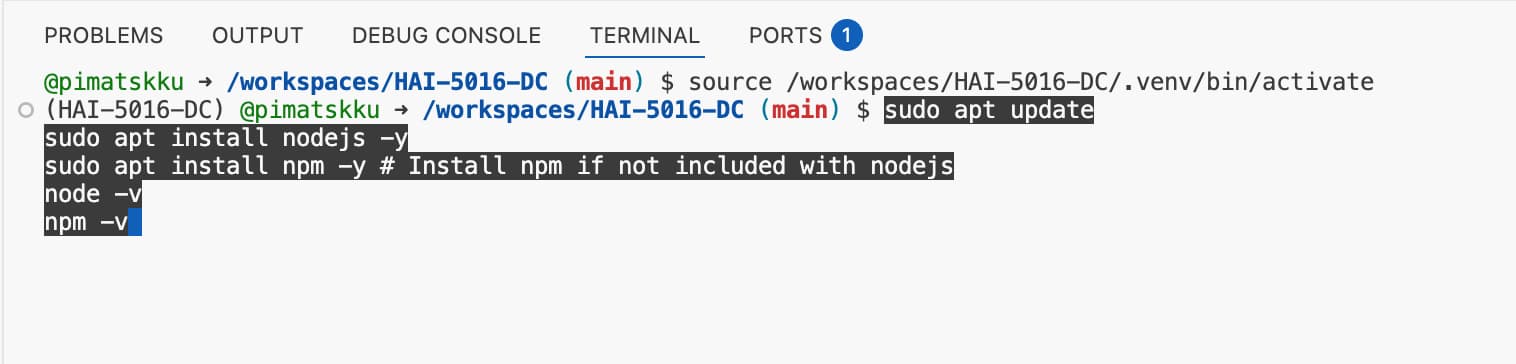
1. Install nodejs and npm in your codespace (dev container)
Many (local) MCP servers extensions require Node.js and npm to be installed on the system, in this case our development container in GitHub Codespaces. To install them, open the terminal in your Codespace and run the following commands:
1
2
3
4
5

sudo apt update
sudo apt install nodejs -y
sudo apt install npm -y # Install npm if not included with nodejs
node -v
npm -v
That should look something like this:
 Wish it would always be that easy!
When installed, you should see the version numbers of Node.js and npm printed in the terminal.
Got some errors thrown at you during installation? Don’t worry, and ask Copilot using inline chat (select the error text and press
ctrl + I) or use theChat: Explain last terminal commandoption from the command palette.
2. Add MCP Servers to VS Code
In recent updates, the Extensions view in VS Code gained a dedicated section for MCP servers. VS Code retrieves the list of MCP servers from the GitHub MCP server registry.
- Open the extensions view in VS Code by clicking on the Extensions icon in the Activity Bar.
-
Scroll down to the
MCP Serverssection.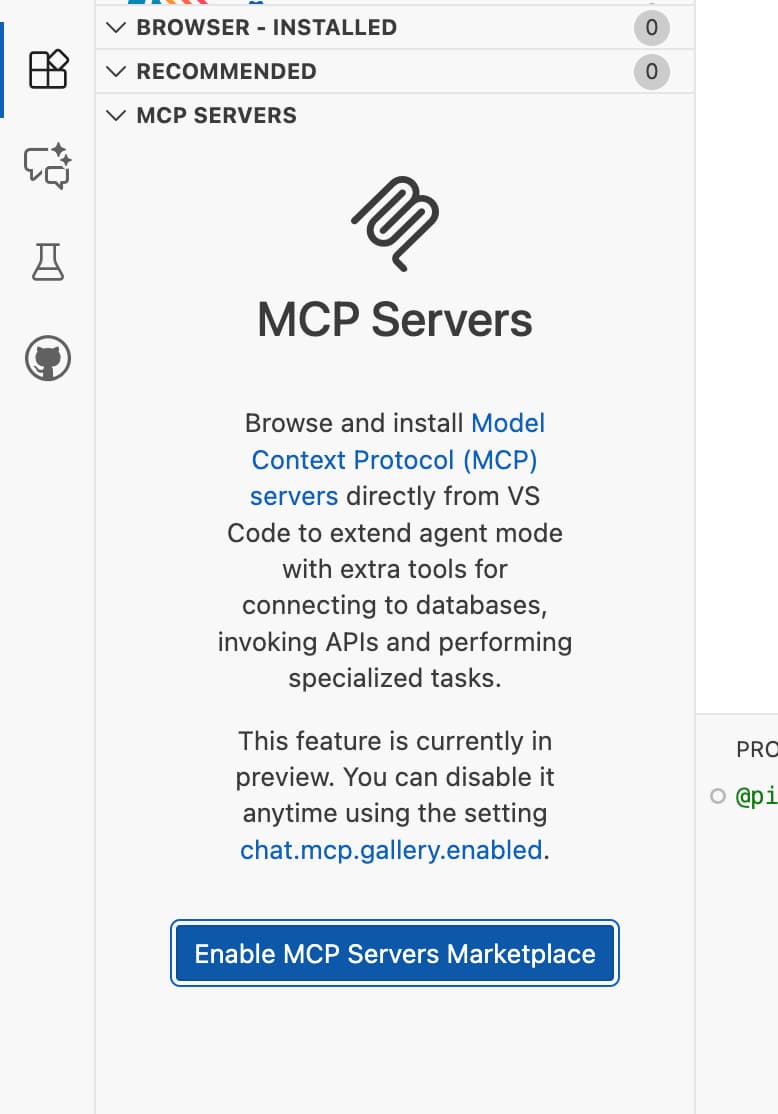 MCP Servers section under ‘extensions’ in VS Code
 - You may have to click on
Enable MCP Servers Marketplaceto see the full list of MCP servers. -
In the search bar, type
Context7and look for theContext7 MCP Serverextension by Upstash. (Or click this link: Context7 MCP Server)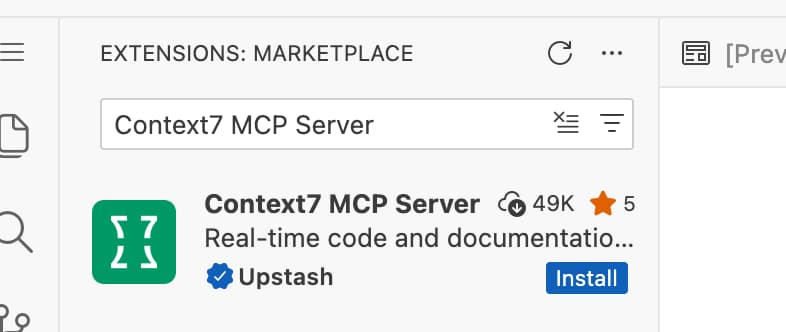 Click ‘install’ when you found the Context7 MCP Server
3. Activate the MCP Server in VS Code
- Open the command palette in VS Code by pressing
Ctrl + Shift + P(orCmd + Shift + Pon macOS). - Find
MCP: List Serversand select it. -
In the list of MCP servers,
Context7 MCP Servershould be there - albeit probably marked asstopped. Activating Context7 MCP Server in VS Code
 -
Select the
Context7 MCP Serverfrom the list, and then chooseStart Server.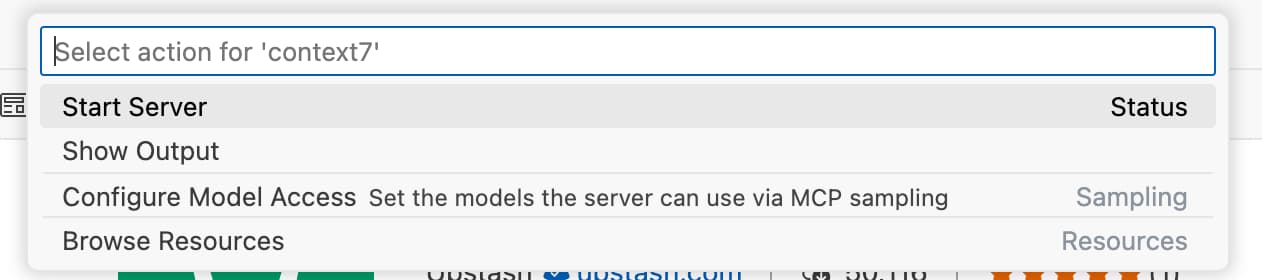 Starting Context7 MCP Server in VS Code
 -
This should open the output tab in your VS Code window, showing that the Context7 MCP server is starting up and discovered (at least) 2 tools.
 Context7 MCP Server started in VS Code
Again, if you run into any issues, don’t hesitate to ask Copilot for help using inline chat or the command palette.
Option 3: Install Context7 MCP Server Locally using Docker
There are multiple ways to install and run the Context7 MCP server on your local machine. One way, that is universal and works across different operating systems, is to use Docker. Let’s go through the steps to set it up using Docker.
Before proceeding, ensure that you have Docker installed on your machine.
- Open your
hai5016-ragproject folder in VS Code -
Create a new file named
Dockerfilein the root of your project with the following content:1 2 3 4 5 6 7 8 9 10 11 12 13 14 15 16 17
FROM node:18-alpine WORKDIR /app # Install the latest version globally RUN npm install -g @upstash/context7-mcp # Expose default port if needed (optional, depends on MCP client interaction) # EXPOSE 3000 # Default command to run the server CMD ["context7-mcp"]``` 3. Save the `Dockerfile`{: .filepath} 4. Build the Docker image by running the following command in the terminal: ```bash docker build -t context7-mcp . - Save the
Dockerfileand commit the changes to your repository -
Build the image using a tag (e.g., context7-mcp). Make sure Docker Desktop is running. Run the following terminal command in the same directory where you saved the Dockerfile:
1

 docker build -t context7-mcp .
Use the Context7 MCP Server with Copilot
Now that the Context7 MCP server is running, Copilot can use it to fetch the latest documentation and code examples while assisting you with coding tasks.
Open a new Chat and try asking Copilot to help you with a coding task, for example:
1

Use context7 to find out how to ground Google Gemini API responses with google search results