[HAI5016] How Many R's Are in the Word 'Raspberry'?

At the beginning of the semester we activated our student perks for several cloud platforms, including Azure, AWS and Google Cloud. We can use our Azure credits for Microsoft Foundry: a range of flagship models—including Azure OpenAI, Anthropic’s Claude, Meta’s Llama, Mistral AI, xAI’s Grok, DeepSeek, and other models from Cohere, NVIDIA, and more — available through OpenAI compatible APIs.
Disclaimer: This blog provides instructions and resources for the workshop part of my lectures. It is not a replacement for attending class; it may not include some critical steps and the foundational background of the techniques and methodologies used. The information may become outdated over time as I do not update the instructions after class.
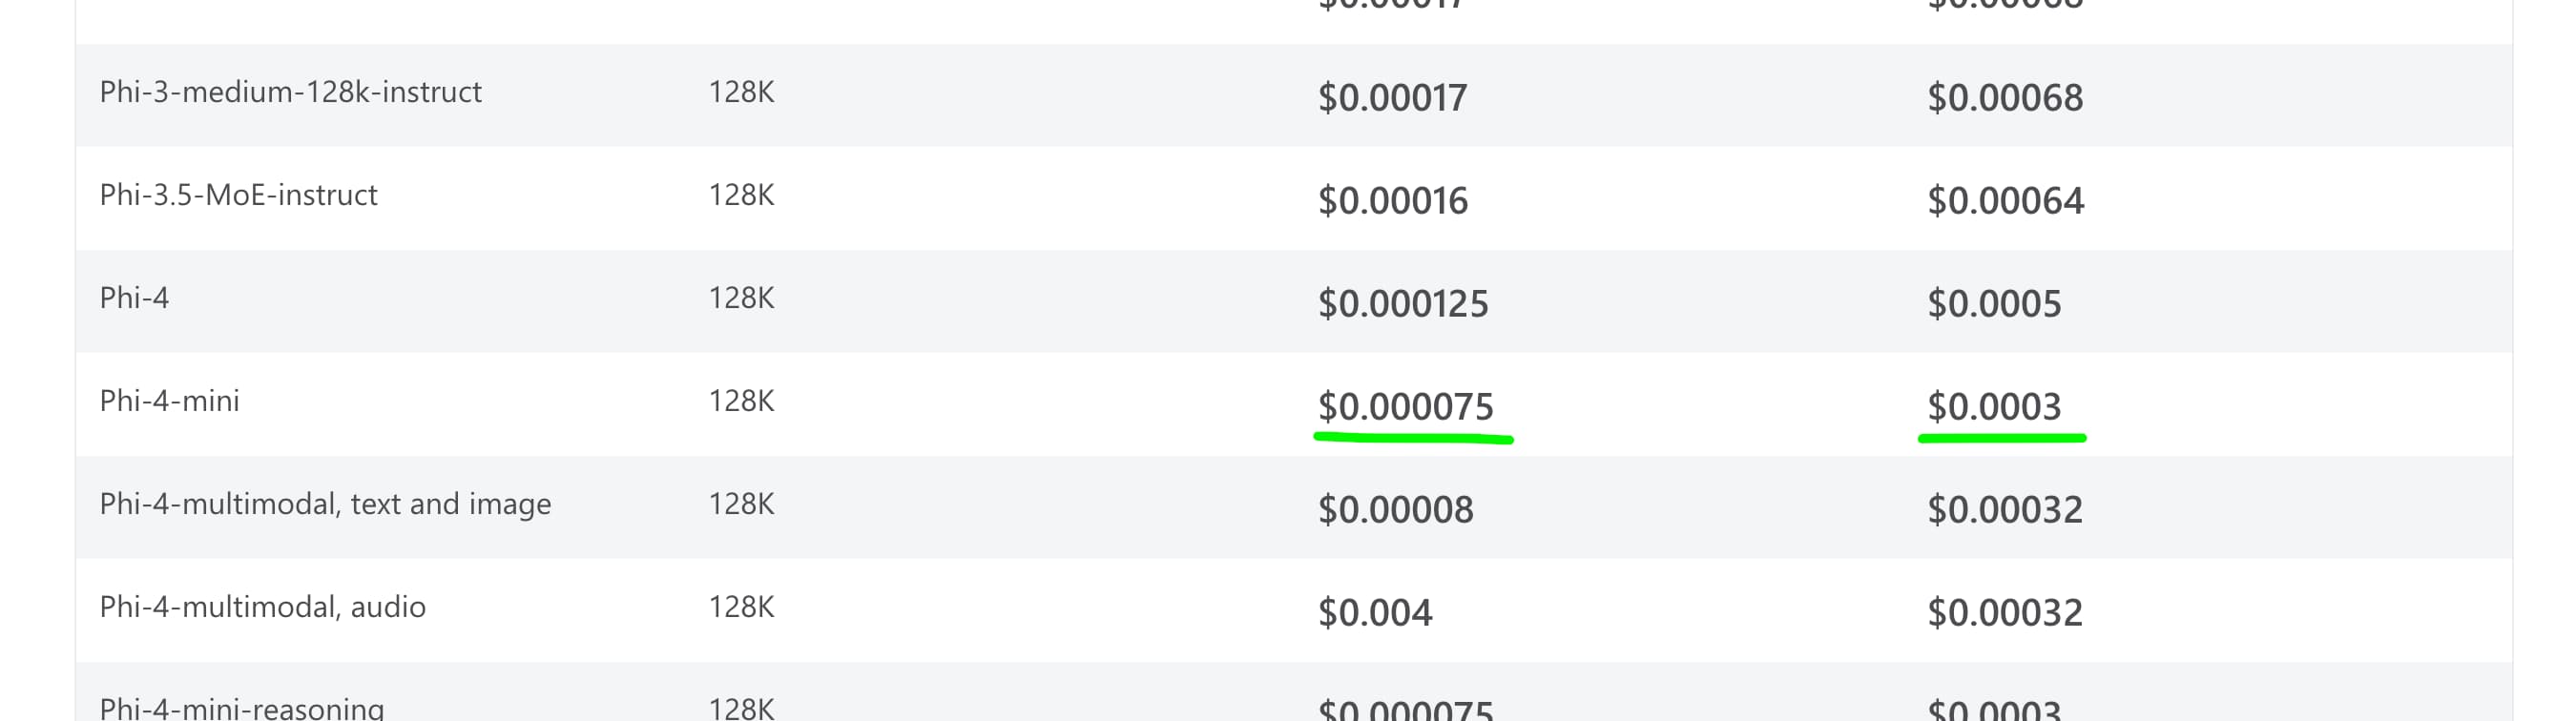
We love free credit, we love cheap tokens. That’s why today we are going to deploy and test (one of) the cheapest models available on Foundry Models. We can have a look at the pricing page to find out which model is the cheapest, and then we can deploy it using the Azure portal. At the moment of writing, the cheapest model is Phi‑4‑mini, which costs $0.000075 per 1K input tokens and $0.0003 per 1K output tokens.
 We love cheap
Exploring and using large language models on Azure Foundry
Before we get our hands dirty, make sure you have activated your Azure for Students subscription and have access to the Azure portal.
1. Deploy a Foundry resource on Azure
-
Go to the Azure portal and search for
Microsoft Foundryin the search bar.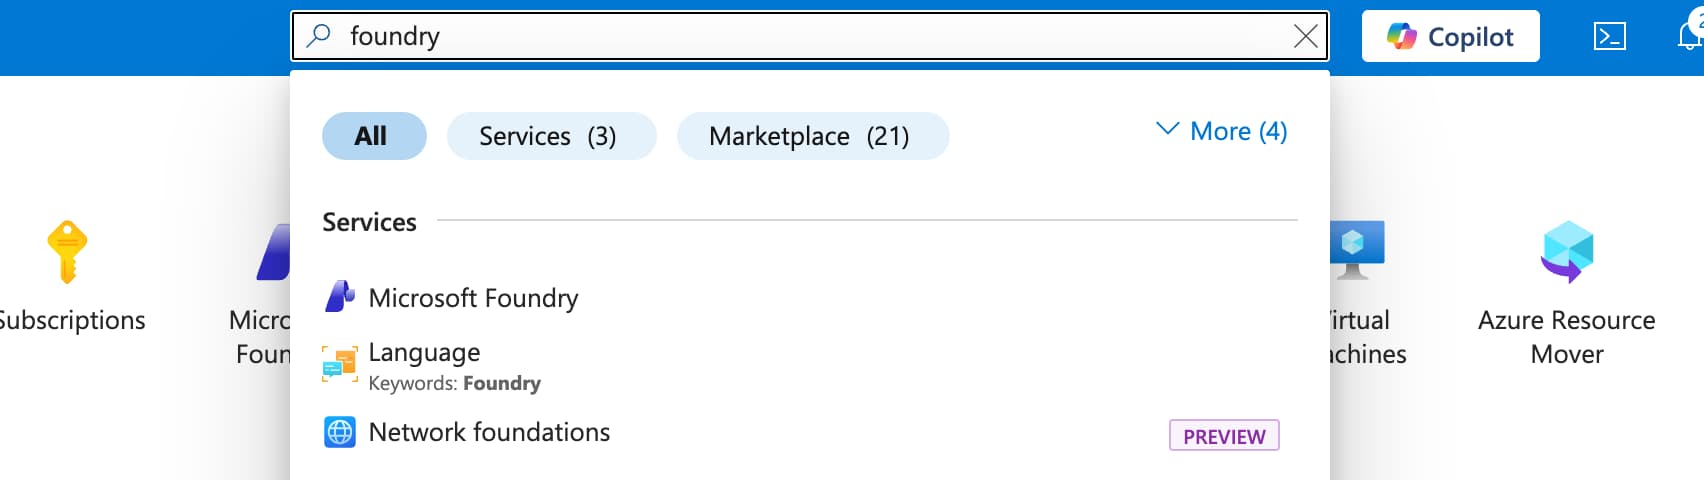 Look for Microsoft Foundry in the results
 - Click on
Create a resource - In the
Create a Foundry resourcepage- Select your subscription (Azure for Students)
-
Create a new resource group (e.g.,
HAI5016-Foundry).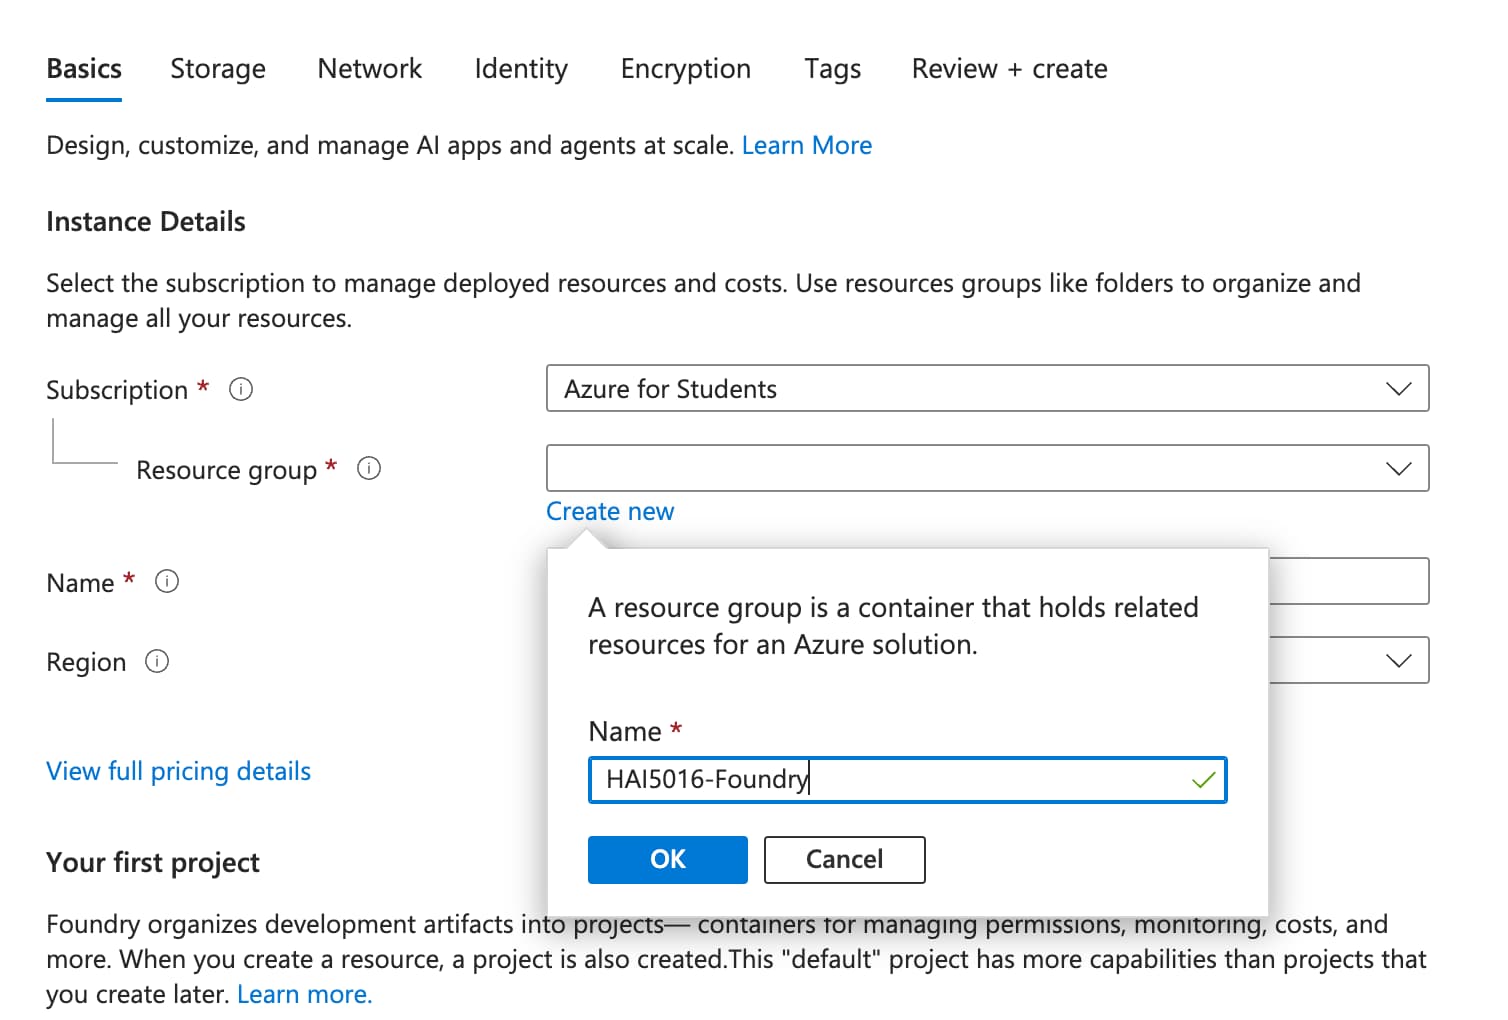 Create a new resource group.
- Enter a name for your Foundry resource. This name must be unique across Azure, so you might want to add some random characters at the end (e.g.,
hai5016-foundry-123dafdsfsa4).Do not use my example name, as it is already taken.
-
Select the region
East US 2.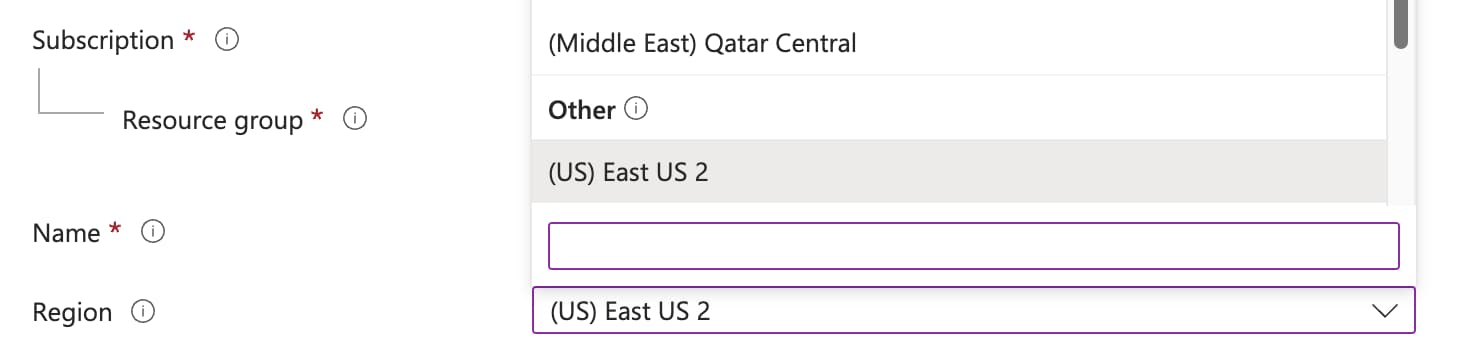 Select the region for your resource deployment
You would usually want to select the region closest to you, but for this exercise we will use
East US 2to ensure that we are using the same model and pricing. - Give your resource a
default project name(e.g.,hai5016-project). - Click on
Review + createand then onCreateto deploy your Foundry resource. This might take a few minutes. -
When the deployment is complete, click on
Go to resourceto go to your Foundry resource.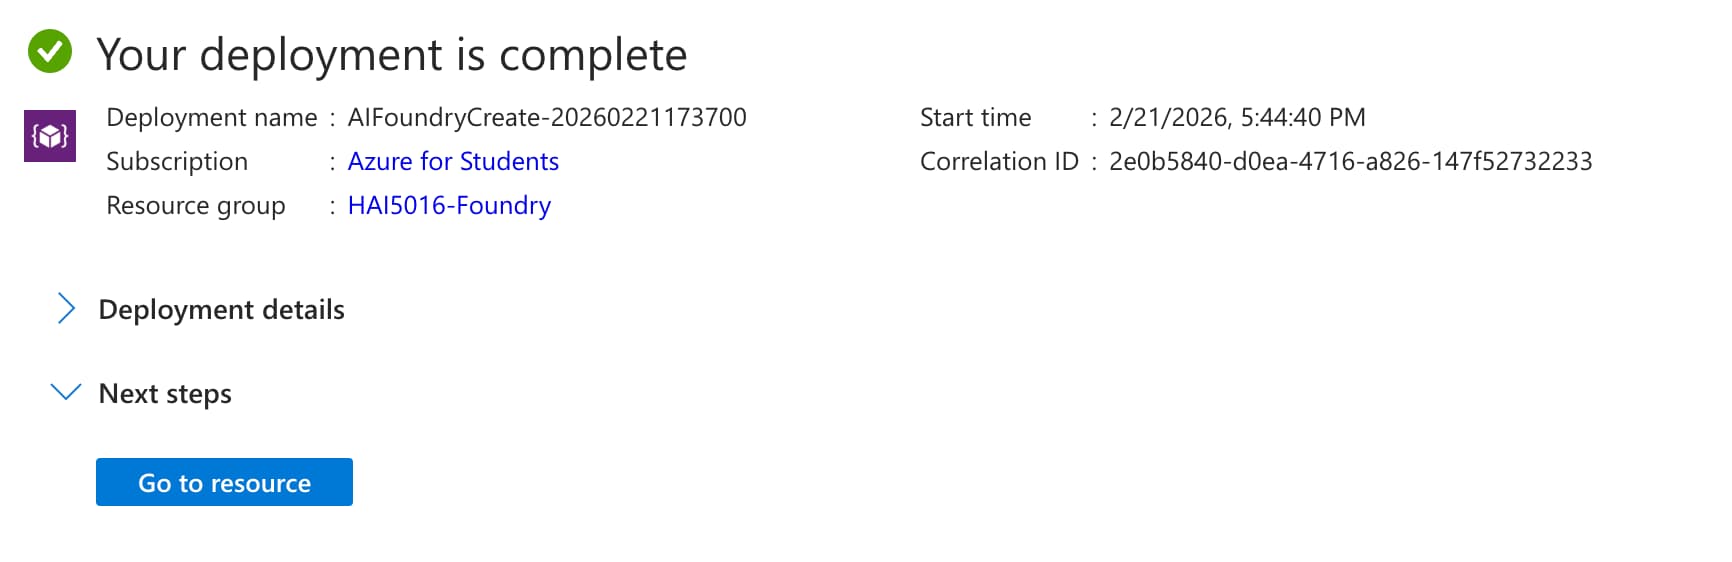 Ready to rock
Explore the Foundry models
-
Go to https://ai.azure.com/. This should open the
hai5016-projectthat you created in the previous step and shows you sheEndpoints and keyspage of your Foundry resource.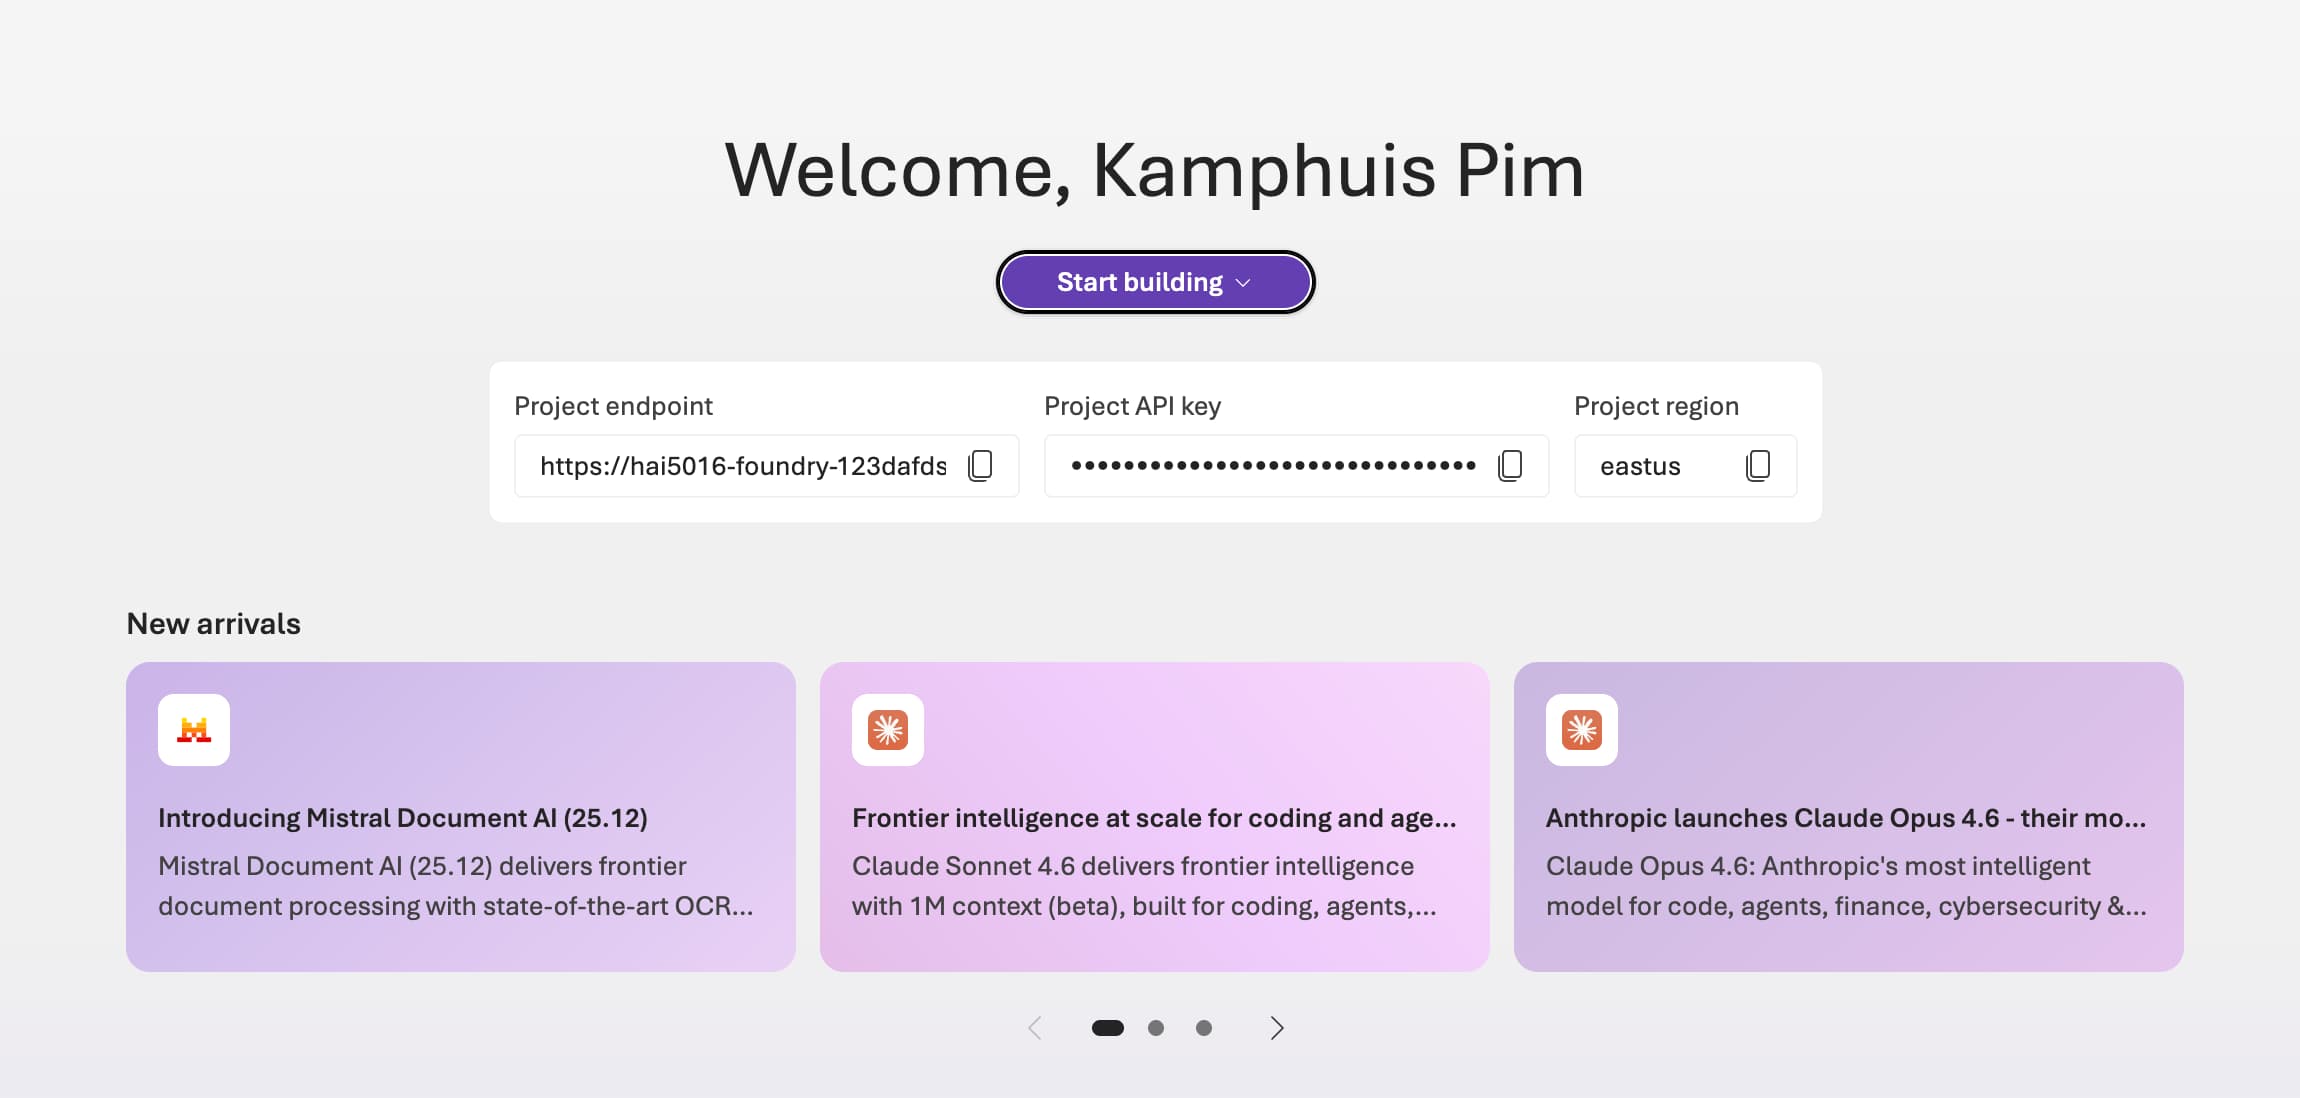 I feel very welcome
Microsoft is currently testing the ‘New foundry` experience, which has a different interface. If you read this before the new experience is rolled out, you might want to open it directly using https://ai.azure.com/nextgen/
- In the top menu click on
Discover -
On the left menu click on
Modelsto see the list of available models. You can filter the models by provider, capabilities, and more.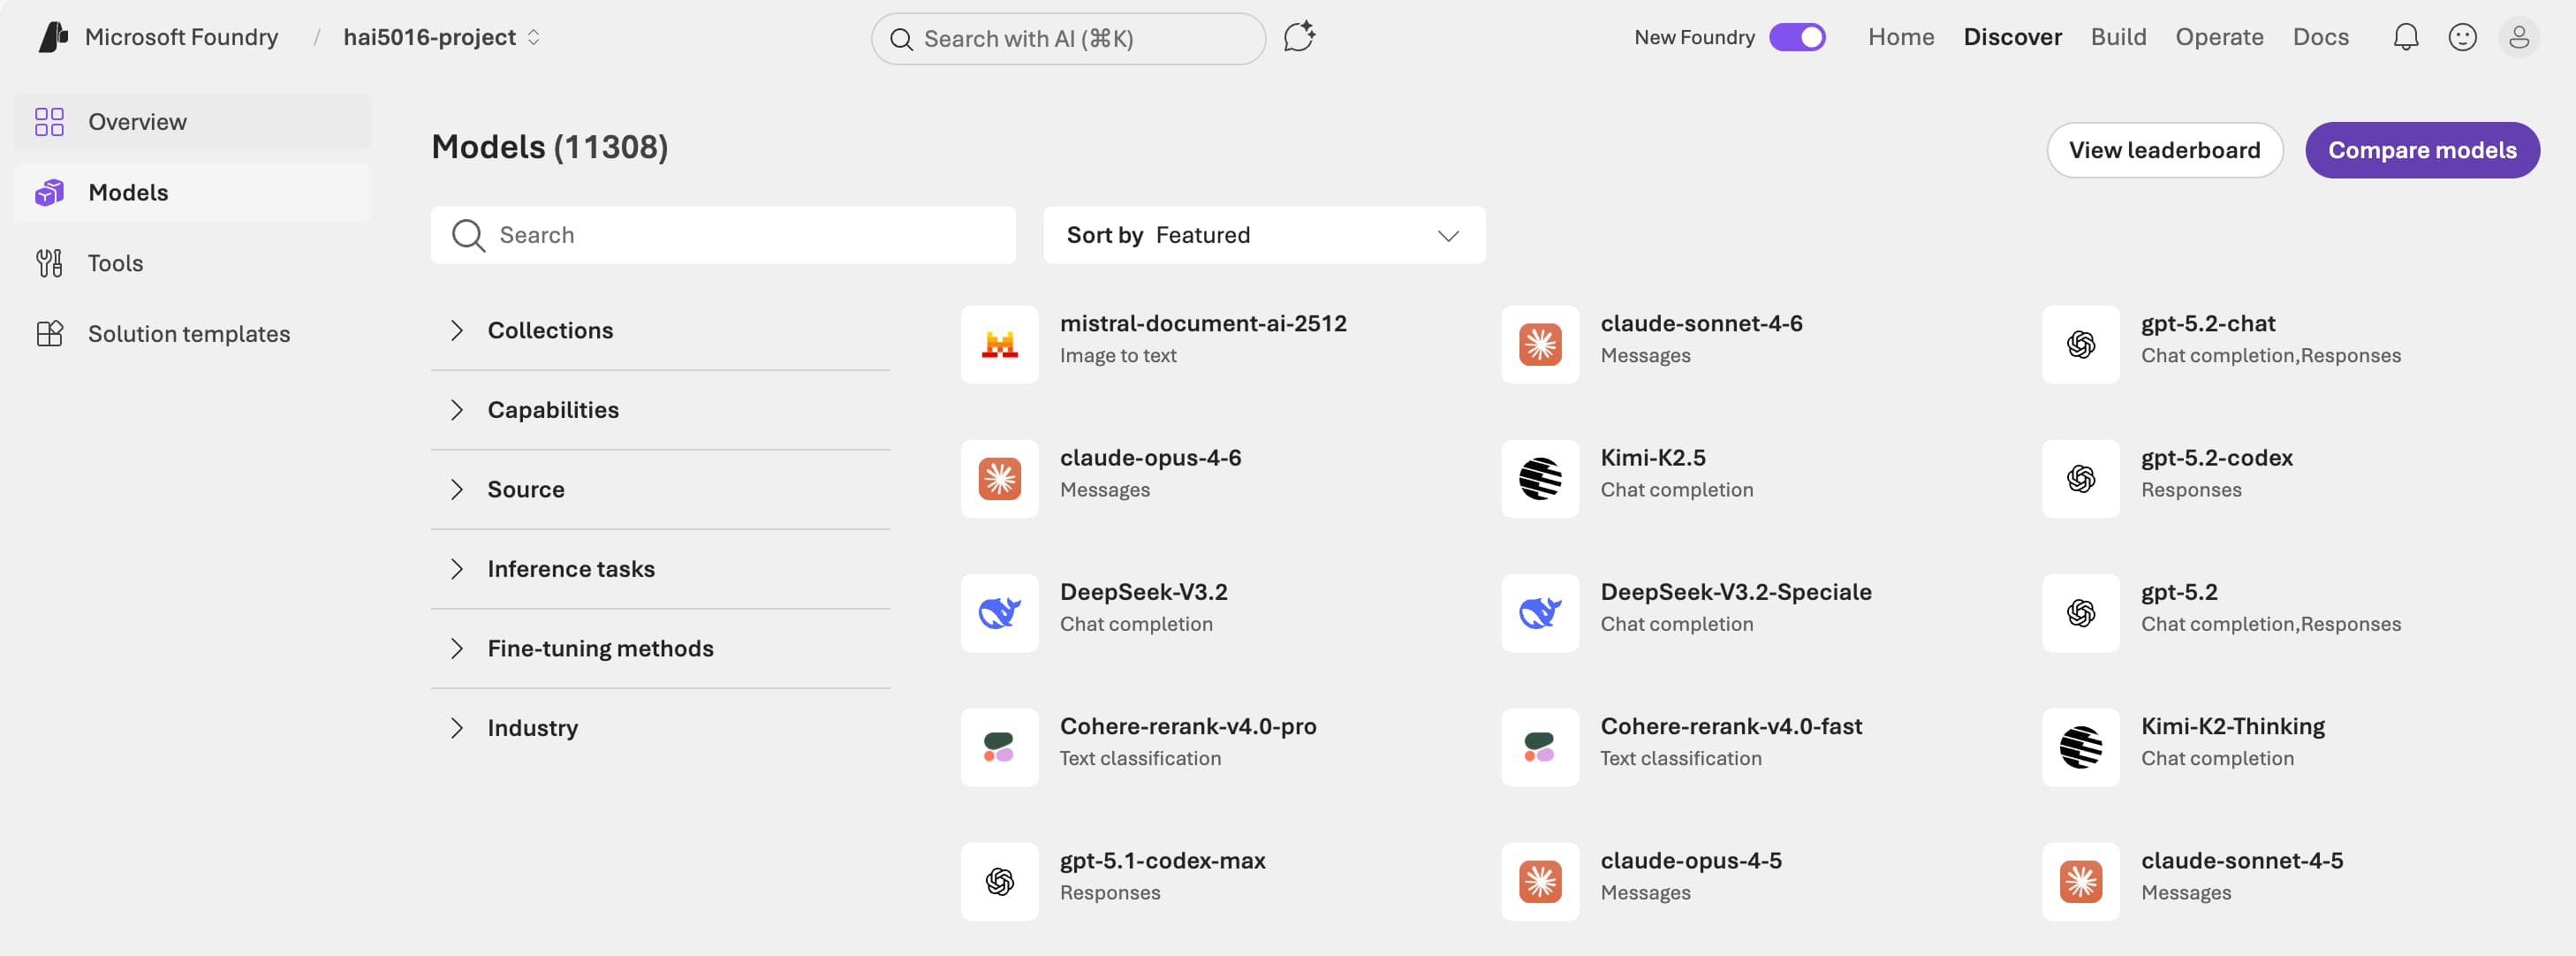 Hot models
 -
Let’s find our cheap model
Phi-4-mini-instructand click on it to see the details.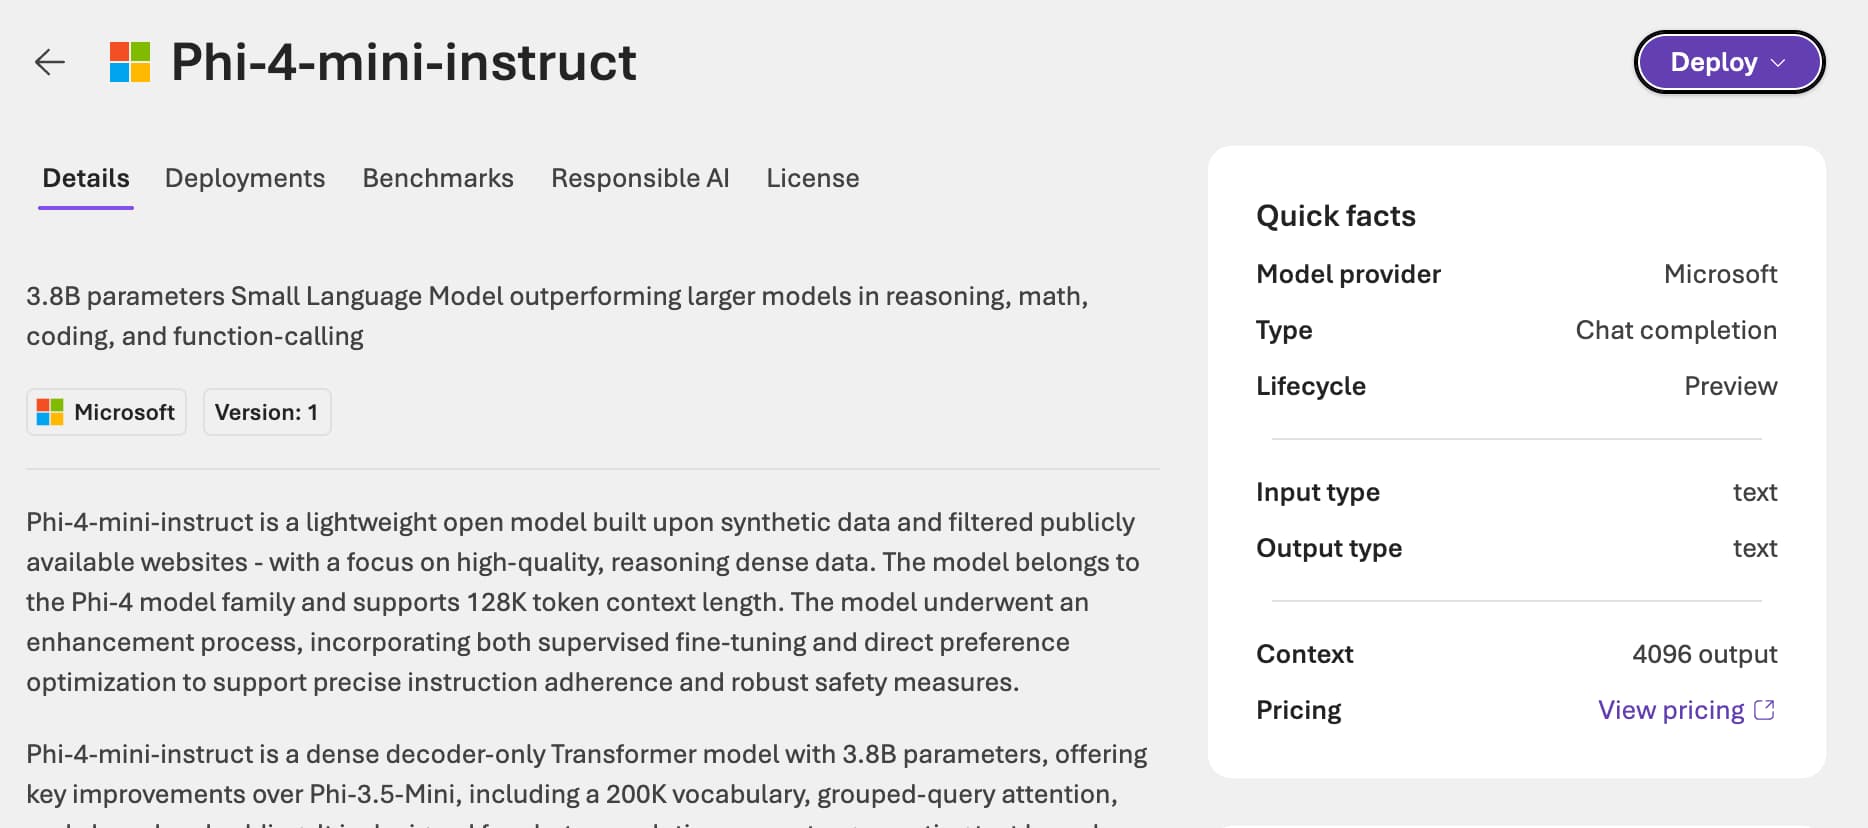 Hot models
 - Click the
Deploybutton in the upper right- Select
Default settings - Click
Agree and proceedto deploy the model Deploying the model
- Select
-
Have a little chat with the model. For example, you can ask
What is the capital of South Korea?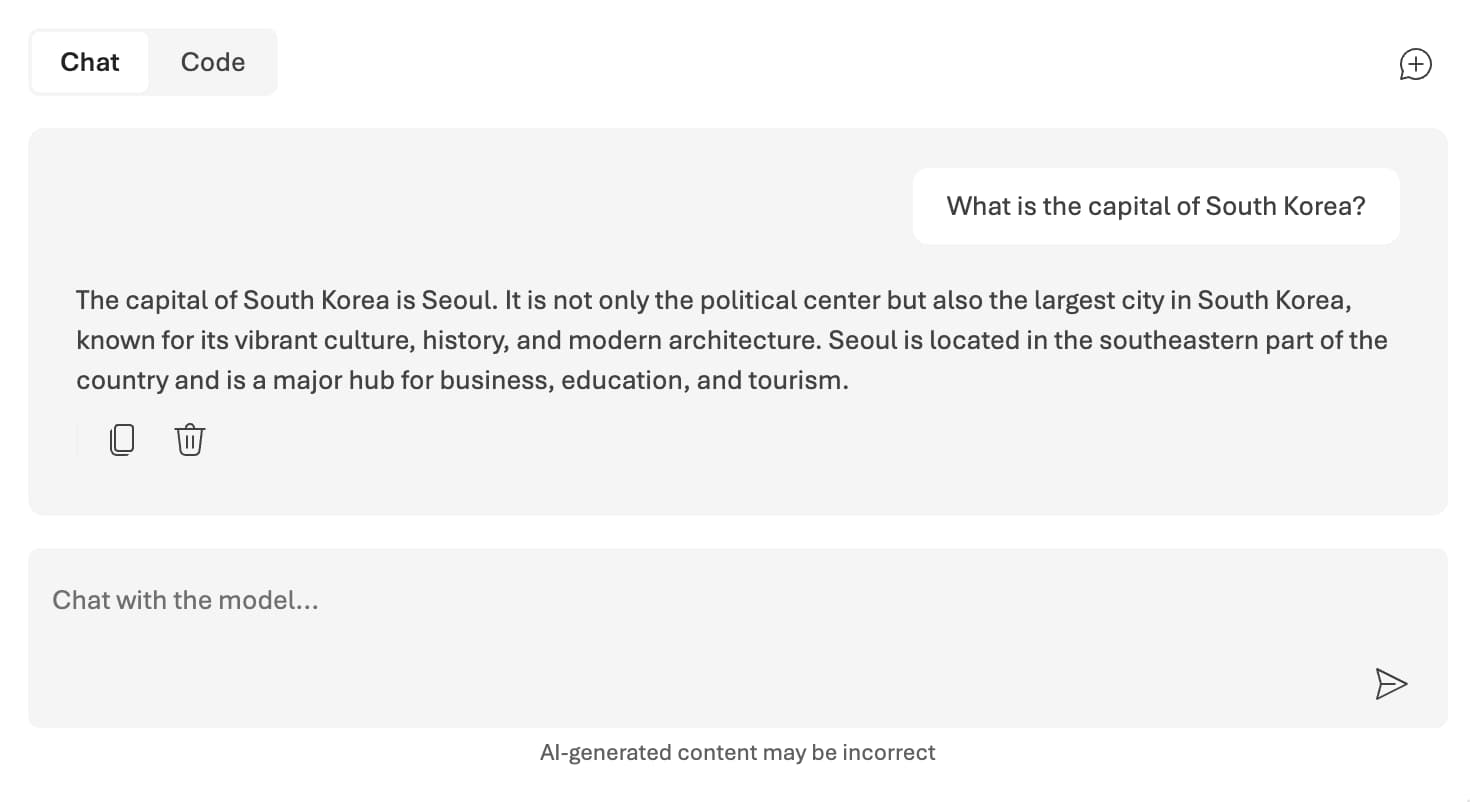 Looks like a pretty knowledgeable model, right?
Let’s try that again
We want to use this (and other) foundry models in our own applications. To do that, we need to get the API key and endpoint of our Foundry resource. Conveniently, the Foundry portal provides us with a code snippet to easily do this with Python:
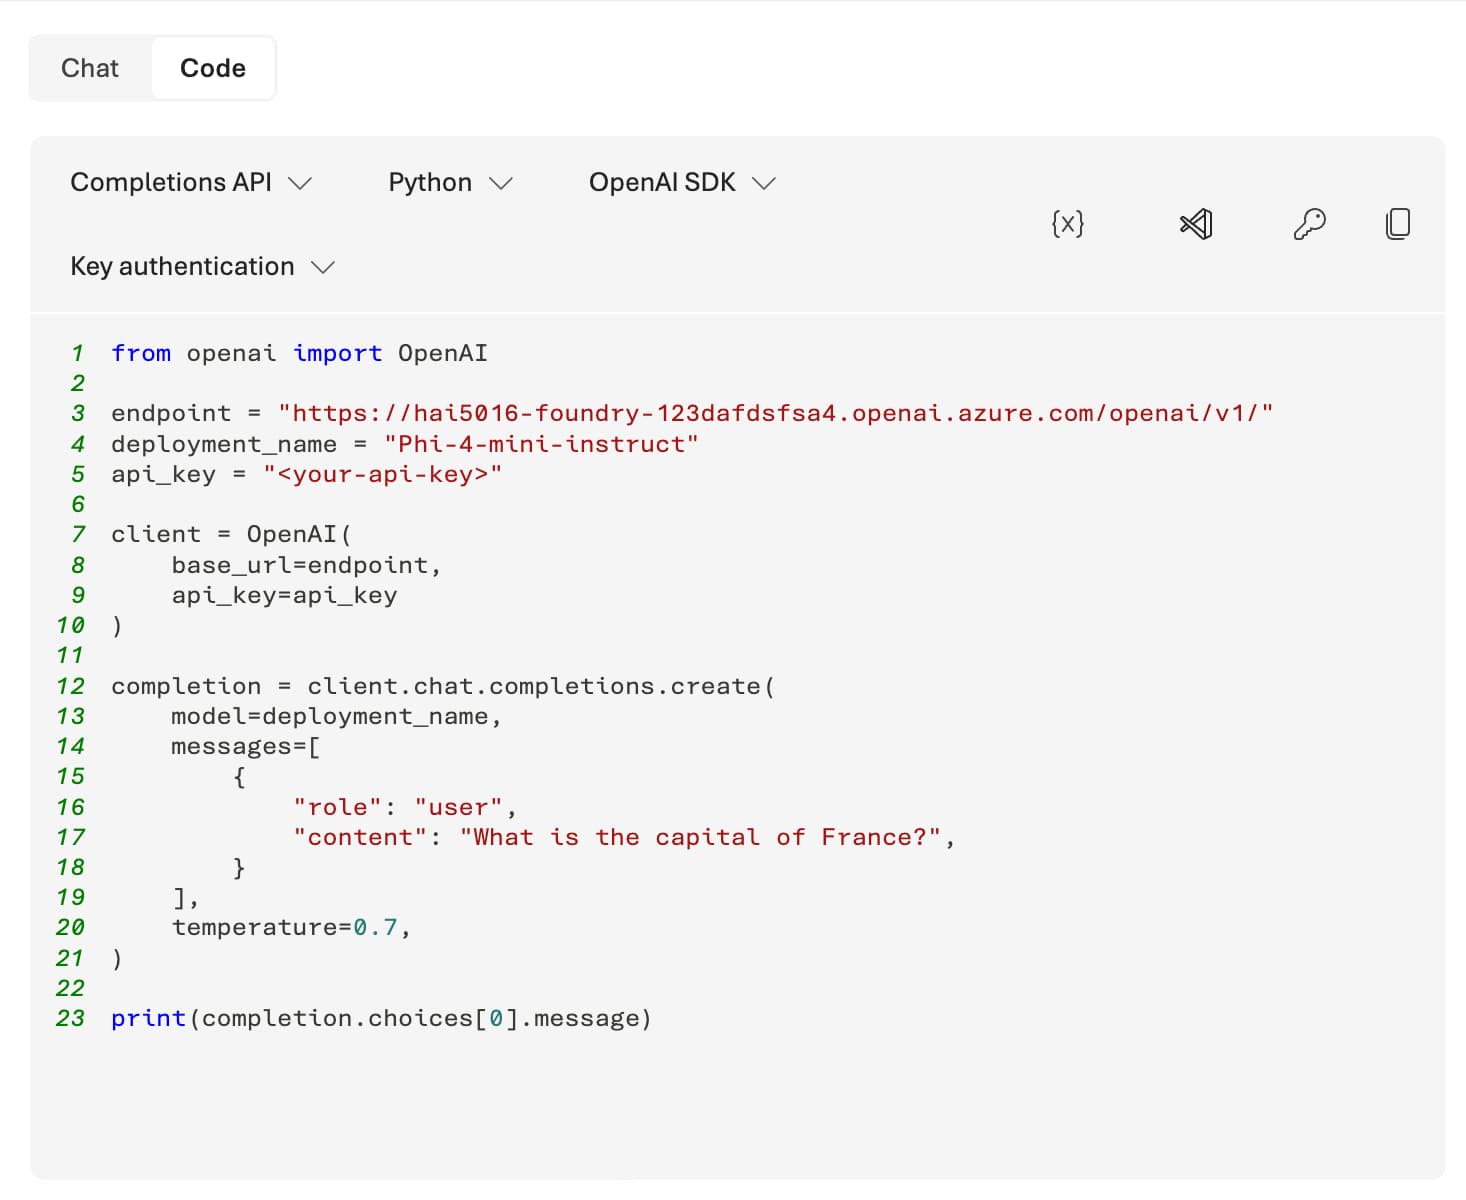 Just press the code button to get the Python code snippet.
1. Copy the code
Depending on if we already covered Jupyter notebooks in class, you can either copy the code snippet to a Jupyter notebook or to a Python file.
In the case of a single python script:
- Create a new file (e.g.,
test_phi_4_mini.py) in your project directory. - Copy the code snippet from the Azure portal and paste it into the newly created Python file.
In case of a Jupyter notebook:
- Create a new Jupyter notebook (e.g.,
test_phi_4_mini.ipynb) in your project directory. -
Split the code snippet into separate cells for better readability and execution. For example, you can have one cell for imports, one cell for setting up the API client, and another cell for making the API call:
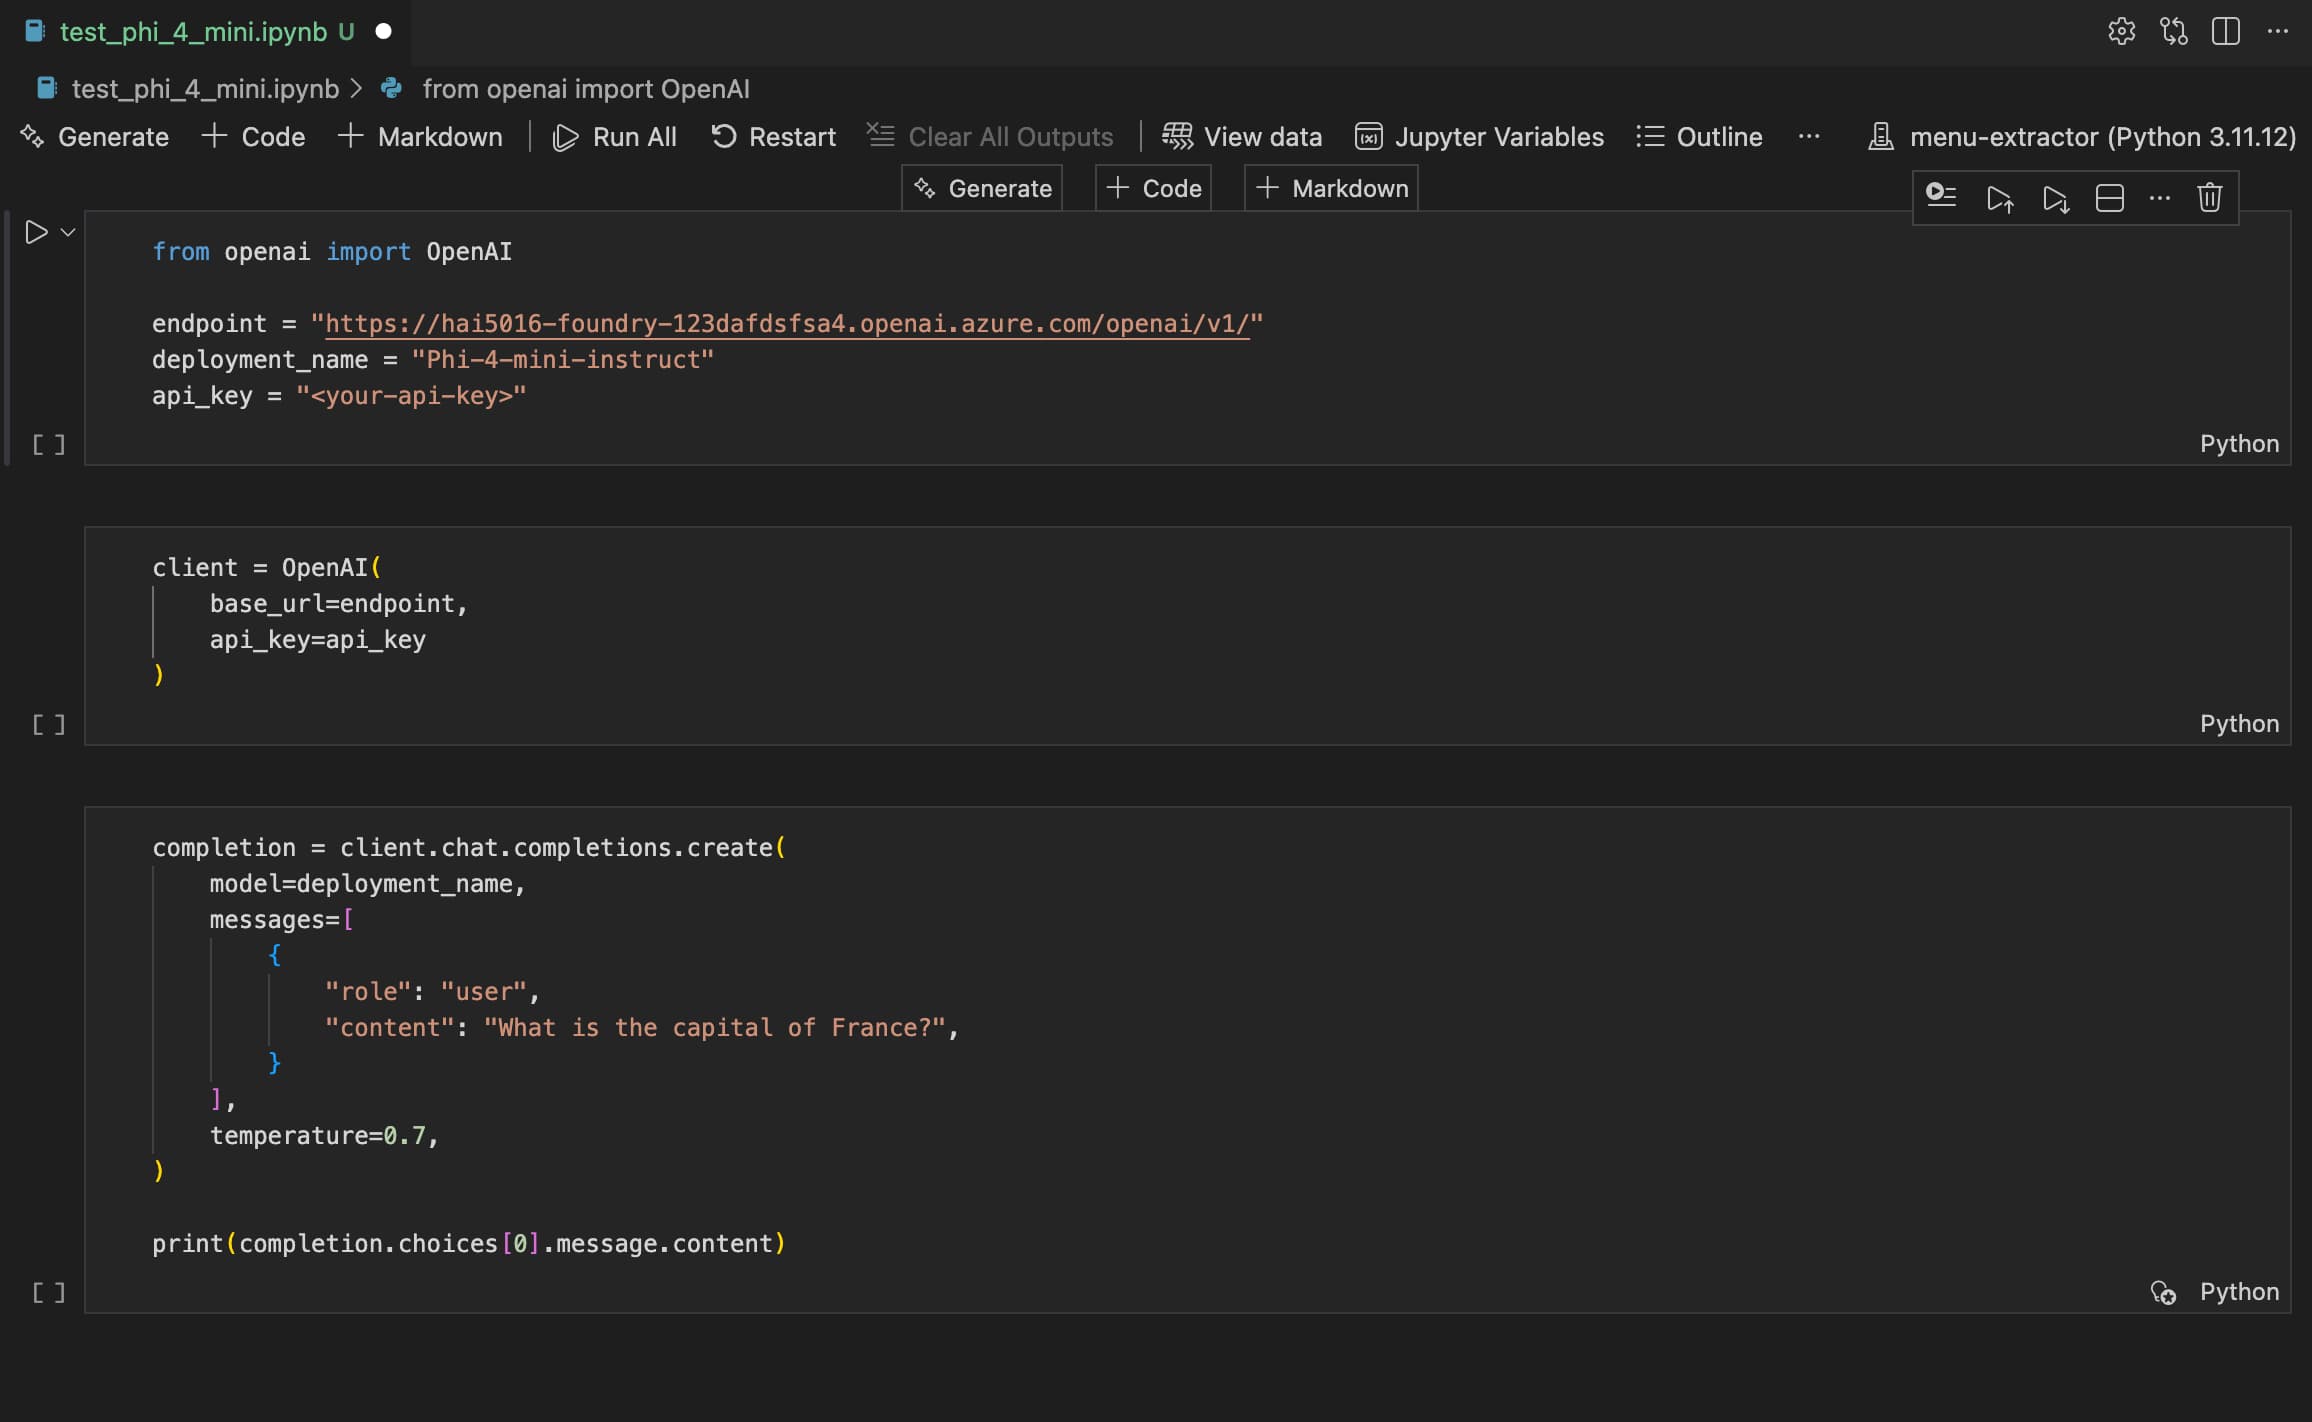 A three split for better readability and execution
Make sure that you have the OpenAI Python library installed in your environment. If you haven’t installed it yet, run
uv add openaiin your terminal to install.
Note on extracting the response content
Whichever method you choose, add .content at the end of the last line of the code snippet to extract just the text from the response content. The final line of your code should look like this:
1

print(completion.choices[0].message.content)
2. Set up your API key
Because we need to identify ourselves to the Azure Foundry service, we need to add our own API key (and endpoint) to the script.
- Go back to the main page of your Foundry project. You can simply click on the
Microsoft Foundrylogo in the top left corner - There you find
Project API key - Click the copy button on the right
- Go back to your code and replace the placeholder
<your-api-key>with the API key you just copied. Make sure to keep the quotation marks around the key.
Run the script
Now you can run the script to see the response from the model. If everything is set up correctly, you should see the answer to your question in the output.
If you changed your API key in the the upper cell, make sure to run that cell before running the cell with the API call. Otherwise, you will still get an authentication error.
If the answer excees the width of your screen, find
notebook.output.wordWrapin the VS Code settings and set it toonto enable word wrapping in the output cells.
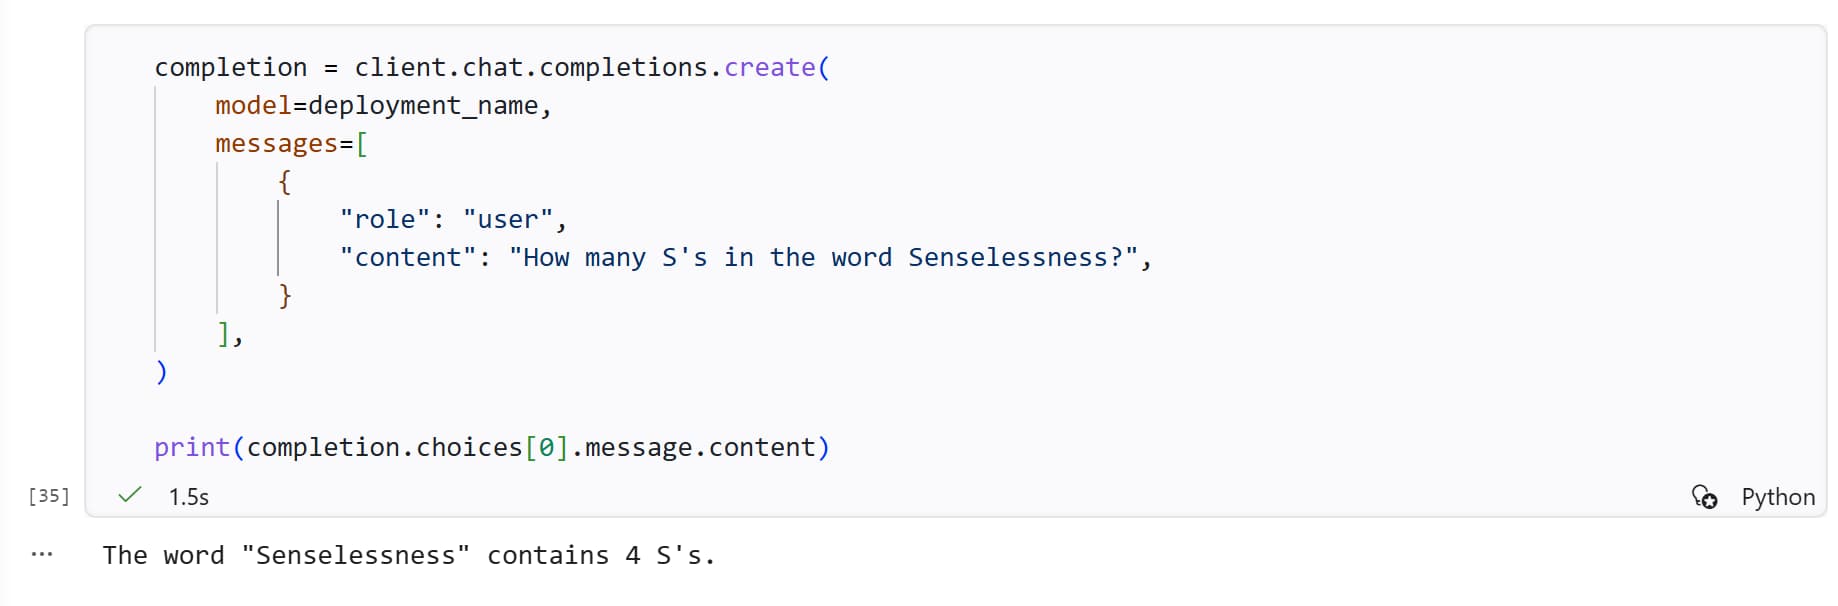
Now let’s ask the model a different question:
1

"How many R's in the word Raspberry?"
Class discussion
- What is the answer you got?
- How does it compare to the other students’ answers?
- What happens if you ask the same question again? Do you get the same answer?
- What happens when you change the
temperatureparameter in the code snippet? Does it affect the answer? - How about
Senselessness? OrMississippi? - Can the model correctly answer
9,11 or 9,9 which one is bigger? - Could you think of a prompt that would make the model give the correct answer? Try it out and see if it works.
 Is it, really?
If time allows: try out other models
Now that you have the basic setup, you can try out other models available in the Foundry portal. You can deploy them using the same steps as before and if you check out the code snippet, you will see that the API key and endpoint are the same for all models in your Foundry project - only the deployment_name parameter changes.
Compare the answers you get from different models for the same question and see if there are any differences in their responses (e.g., in terms of response time, accuracy, detail, or creativity).