[HAI5016] Scrape that plate!

Last week we deployed a cheap model on Azure Foundry and tested it with a simple prompt. This week we are going to put it to use: we are going to scrape the menu data from our university cafeteria website and extract the menu items in a structured format using the large language model deployed on Azure Foundry.
Disclaimer: This blog provides instructions and resources for the workshop part of my lectures. It is not a replacement for attending class; it may not include some critical steps and the foundational background of the techniques and methodologies used. The information may become outdated over time as I do not update the instructions after class.
Prepare our project folder hai5016-project
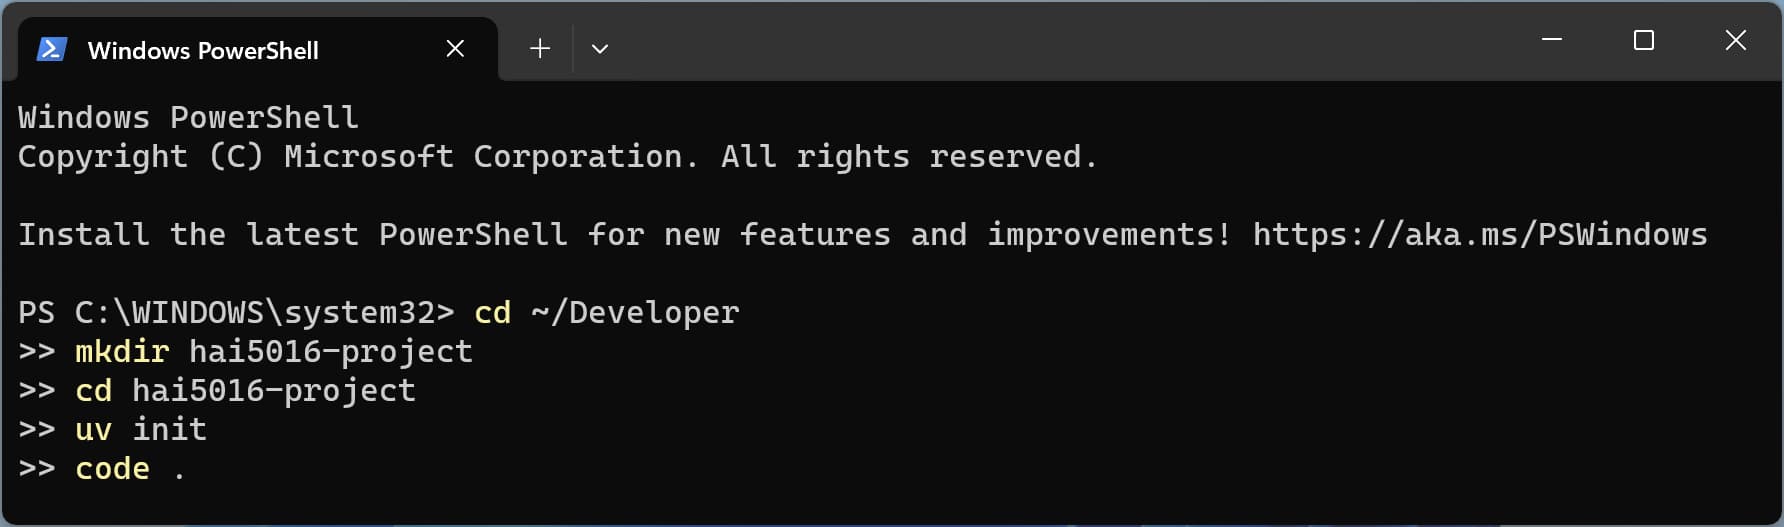
Before we start cooking, there are a few things we need to prepare. For every project, we create a new project folder, initialize a git repository, launch a virtual environment, and open it in our code editor. This way we can keep our projects organized and manage our dependencies easily. With our recently installed state-of-the-art toolkit, we can do this all in one shot:
- Open your terminal (e.g., PowerShell, Terminal, etc.)
-
Copy and paste the following command and hit enter:
1
2
3
4
5

cd ~/Developer
mkdir hai5016-project
cd hai5016-project
uv init
code .
 Prepare it all in one shot
And there we have it! We have a new project folder called hai5016-project in our Developer directory, we have initialized a git repository, we have prepared a Python environment, and we have opened the project in our code editor. Now we are ready to start cooking!
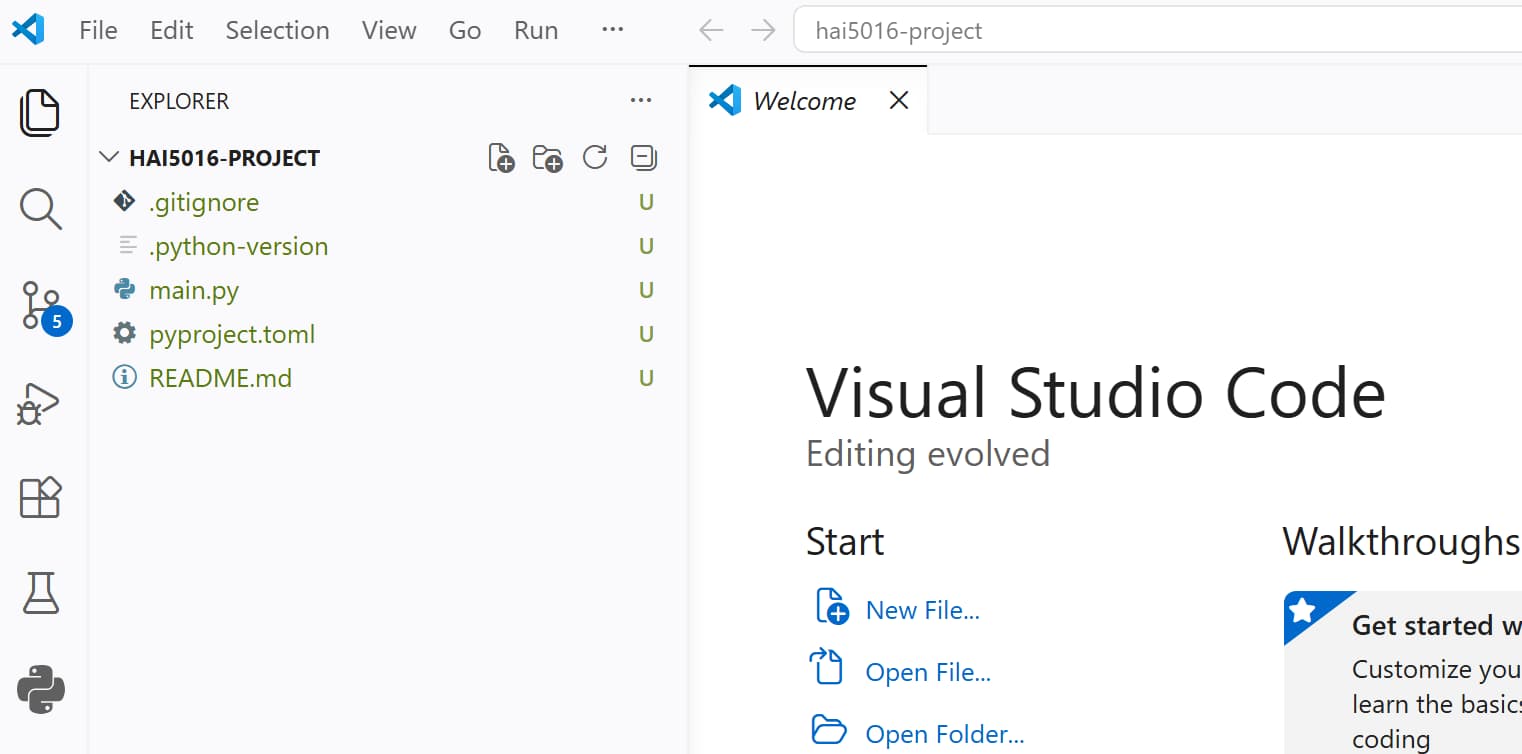 Shiny new stars in our new project folder
If somehow your Visual Studio Code does not open after running the command, you just open Visual Studio Code manually, look up
hai5016-projectin theDeveloperfolder in your home directory, and open it from there.
Add the basic Python dependencies
We are going to use the following Python libraries for our project:
-
httpxfor making HTTP requests to websites and download their HTML content -
beautifulsoup4for parsing the HTML content of the cafeteria website and extracting the menu data -
python-dotenvfor loading environment variables from a.envfile, where we will store our Azure Foundry API key and other configuration variables/secrets. -
openaifor making API calls to the Azure Foundry model -
logurufor logging and debugging our code -
openpyxlfor working with Excel files, which we will use to read the list of URLs for the cafeteria menu pages that we want to scrapeYou can find more infomration about these libraries in the references section at the end of this article.
Conveniently, we can install all these dependencies in one command using uv:
- If there is no terminal open in your code editor, open a new terminal via the top menu
Terminal > New Terminal. This should open a terminal within our project directory. -
Copy and paste the following command:
1
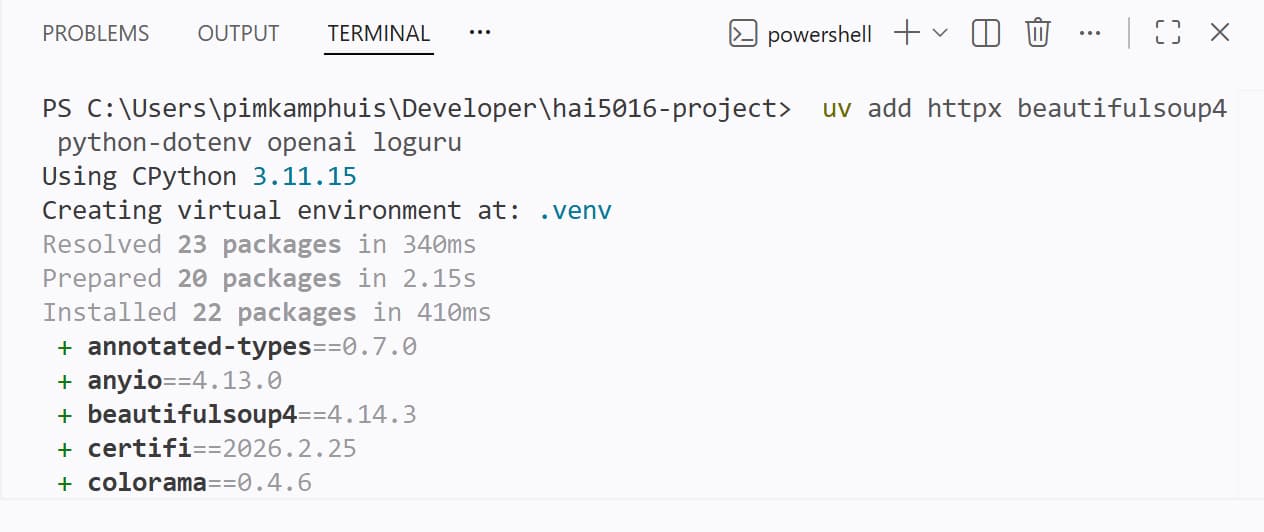
uv add httpx beautifulsoup4 python-dotenv openai loguru openpyxl
-
Hit enter to run the command and install the dependencies as you can see below
 Poof
Poof
After running the command, you can check the pyproject.toml file to see that the dependencies have been added correctly. Additionally, you can see a .venv folder in your project directory, which contains the virtual environment with all the installed dependencies.
Commit the changes to git
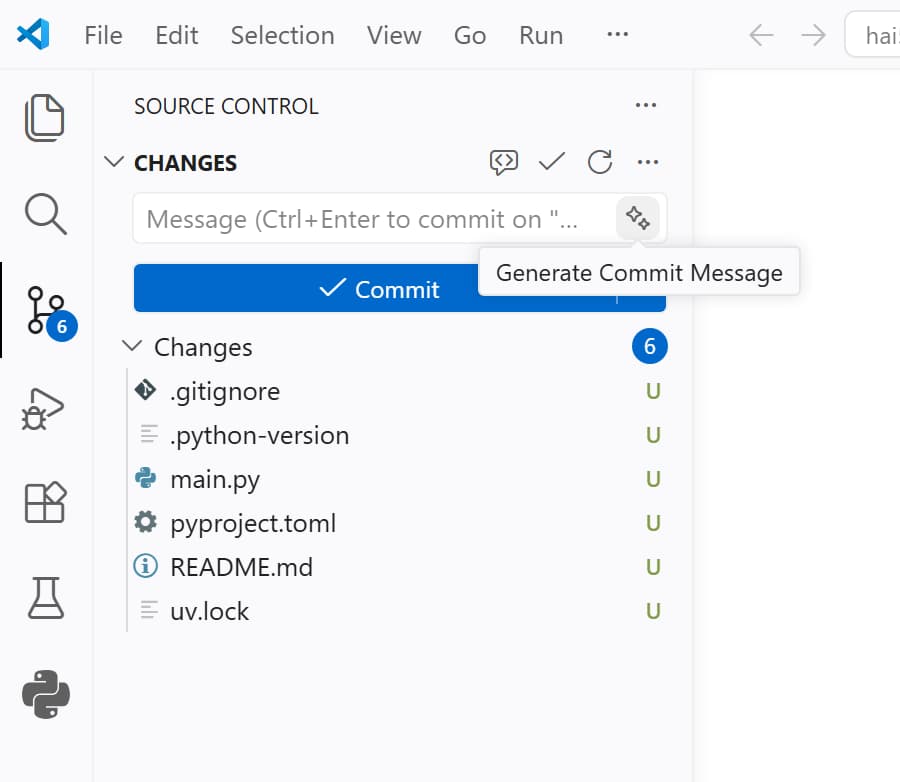
As you may have noticed, a pending changes notification counter has appeared in the source control tab in the left activity bar of Visual Studio Code. This is because we have made changes to our project’s code by adding dependencies, and these changes are not yet committed to our git repository.
Let’s click on the source control tab (the one with the git icon) and we will see a list of all the changes we have made.
Back in the days, we would remember the changes we made and summarize them in a commit message to commit the changes to our git repository. But now in the era of AI and, specifically CoPilot, we can simply click the magic stars button to have it scan our changes and automatically generate a commit message for us. Let’s give it a try!
Mine came up with
Implement code structure updates and clean up unused code segments. I am not happy with that and decided to replace it with a classic first commit message:Initial commit with project setup and dependencies.
- Press
commitwhen you are happy with the commit message and the changes will be committed to your git repository - Have a look at the
Graphpanel just below to see the commit history and the graph of your commits. You should see your initial commit there.
If time allows: Publish your repository on GitHub
After committing the changes, a Publish Branch button will appear in the source control tab. This is because we have not yet published our local repository to a remote repository on GitHub. By clicking on the Publish Branch button, you can easily publish your local repository to GitHub.
- Click on the
Publish Branchbutton - If you are not logged in to GitHub, it will ask you to log in.
- After logging in, it will ask you to choose a name for your repository and whether you want it to be public or private. Choose a name and set it to public (so that I can see it) and click
Publish.
After publishing, Visual Studio Code may ask if you want to run Git Fetch periodically to sync with the remote repository. You can choose
Yesto keep your local repository in sync with the remote repository on GitHub.
The .env file
Last class we put our API endpoint, model informatio and API key directly in the code.
This is not a good practice, especially when we want to share our code with others or push it to a public repository. Instead, we should store these sensitive information in a separate file called .env file and load them as environment variables in our code. This way, we can keep our secrets safe and easily manage different configurations for different environments (e.g., development, production, etc.)
- Create a new file in the root of your project directory and name it
.env -
Open the
.envfile and add the following lines to it:1 2 3
AZURE_FOUNDRY_API_KEY=your_api_key_here AZURE_FOUNDRY_ENDPOINT=your_endpoint_here AZURE_FOUNDRY_MODEL=your_model_name_here
-
Save the
.envfile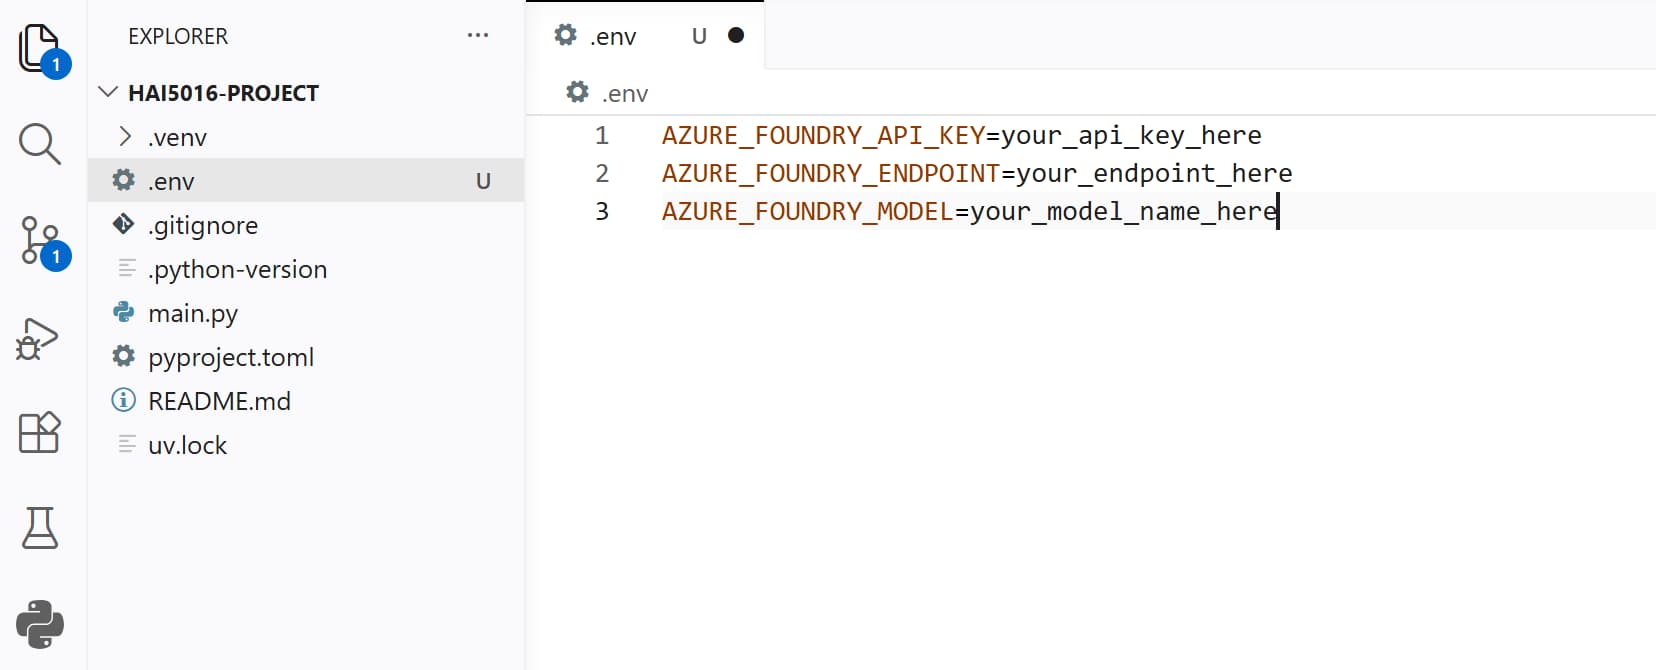 Our parameters and secrets in a separate .env file
⚠️ Add .env to .gitignore ⚠️
After saving the .env file, you will see that it appears in the source control tab as a change that we did not commit yet. However, we do not want to commit this file to our git repository because it contains sensitive information (our API key). Therefore:
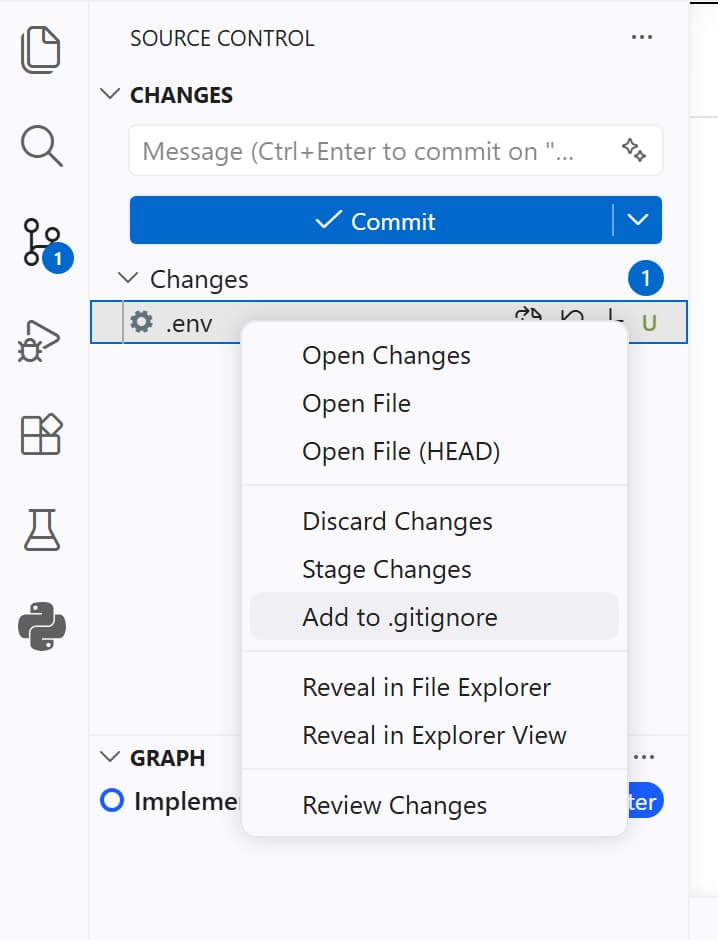
- Click on the
.envfile in the source control tab - Click on
Add to .gitignore
The .gitignore file will open with the .env file added to it (probably at the end of the file).
- Check if the
.envfile is now listed in the.gitignorefile - Save the changes
- Go back to the source control tab
- Make sure that the
.envfile is no longer listed there and replaced by the.gitignorewhich we just updated - Have Copilot summarize the changes in a commit message
- Commit the changes to your git repository
Replace the placeholders in the .env file
Now we need to replace the placeholders in the .env file with the actual values of our Azure Foundry API key, endpoint, and model name.
If time and Azure allow, let’s deploy a the GPT-5-nano model first
- Go to the Azure Foundry portal and navigate to your project
- Copy the API key and paste it in the
.envfile, replacing theyour_api_key_hereplaceholder. Make sure to keep the quotation marks around the key - Copy the Azure OpenAI endpoint and paste it in the
.envfile, replacing theyour_endpoint_hereplaceholder. Make sure to keep the quotation marks around the endpoint - Replace the
your_model_name_hereplaceholder with the name of the model you deployed
If time allows: Let’s have Copilot test the API connection for us
Now that we have our .env file set up with the correct values, we can ask Copilot to write a simple script to test the connection to the Azure Foundry API and make sure that everything is working correctly.
1

Using the parameters in this .env file, create a testapi.py script to test the OpenAI API and ask the model how many R's there are in te word raspberry. The openai package is yet installed in our .venv
Download the Excel file
For the sake of time I have randomly copied some urls for our shared Google Sheets file and put them in an Excel file. You can download the file from this link and save it in your project directory (you may need to right click -> Save Link As)
Let Copilot cook the code for us
Now that we are all set up, we can finally start cooking the code to scrape the menu data from the cafeteria websites and extract the menu items using the Azure Foundry model.
Prompt away
1
2
3
4
5
6
7
8
9
10
11
12
13
14
15
16
17
18
19
20
21
22
23
24
25
26
27
28
29
30
31
32
33

I have a .env file with my API settings and a Excel file named Campus restaurant websites.xlsx Check these files and then:

Create a scrape.py script that
- loads the settings form the .env file.
- Read the Excel file and use the 'University' and 'url' columns.
- For each url, download the page and get readable text.
- Send the text to an AI model and ask it to extract menu info into JSON.
- For each menu item, include: scrape_date, url, menu_date, meal_type, meal_name, price_krw, university, restaurant_name.
    - Meal type should be "breakfast", "lunch", "dinner" or "unknown" based on the information you found on the site.
    - If the price is unknown, set price_krw to "".
- Keep going even if one website fails and also move on if a request. takes more than 5 seconds.
- Add results to a JSON line as soon as you have extracted the menu.
- Save the JSON lines to a file named results/menus-YYYY-MM-DD.jsonl.
- Use UV (e.g. UV add <pythonpackage>) to manage dependencies and virtual environment.
- Use httpx for making the HTTP requests and make sure to mimic a user agent to avoid being blocked by websites.
- Use the OpenAI API to extract menu information from the text. Use the endpoint and azure deployment from the .env file.
- Use loguru to log steps, items, progress and errors into a logs folder.
- Skip a site if it fails to load or takes more than 5 seconds, and log the error.
- Do not make records for empty or invalid meals.
- Do not add temperature or other custom parameters to the OpenAI API request.
- Make sure that meal name really is a meal name and not just a random text. If the AI model is not confident about the meal name, skip that item.
- One JSON object per menu item that looks like:
    {
        "scrape_date": "2024-06-01 12:00:00",
        "url": "http://example.com/menu1",
        "menu_date": "2024-06-01",
        "meal_type": "Lunch",
        "meal_name": "간장돼지불고기",
        "price_krw": "5000",
        "university": "SKKU",
        "restaurant": "패컬티식당",
    }
- Whenever asked for permissions, read the permissions carefully and click
Allow in this Sessionif you are comfortable with them. This will allow the Copilot Agent to access files, tools and run shell code in your project to complete the tasks.
Organize our changes and .gitignore
After we have cooked the code with the help of Copilot, we will have made a lot of changes to our project. We have added a new script, results and logs. Let’s go over the suggested changes for our commit and update our .gitignore file to keep our repository clean from results and logs.
Add to .gitignore:
- Data files:
results/ - Log files:
logs/ - Excel files:
*.xlsx
Challenge
Did you get a working scraper with the help of Copilot? Did it output JSON lines in your results folder?
I challenge you to come up with the best scraper two week later. Some idea’s
- Have copilot create a analyse_results.ipynb notebook that reads the JSON lines and creates some visualizations of the menu data (e.g., most common meals, price distribution, etc.)
- Then share your findings with Copilot and ask it to improve the scraper
- Add more urls to the Excel file and see if your scraper can handle them
- Try to deploy a different model on Azure Foundry and see if it improves the results
My code from today’s session will be available in this GitHub repository: https://github.com/pimatskku/hai5016-project
References
Custom Copilot Instructions: GitHub - pimatskku HAI5016-codes
Python libraries: