[HAI5016] Your daily menu briefing

In our final class, we will connect the last pieces of the semester into one end-to-end workflow. First we add a menu scraping function from GitHub and run it with GitHub Actions, then we add a parser and database table in the same way, and finally we give our agent a SQL tool so it can query the data directly.
Disclaimer: This blog provides instructions and resources for the workshop part of my lectures. It is not a replacement for attending class; it may not include some critical steps and the foundational background of the techniques and methodologies used. The information may become outdated over time as I do not update the instructions after class.
Model switch: I decided to switch the base model for our Agent and other scripts from gpt-5-nano to gpt-5-mini. While the nano is cheaper and faster, I found that the mini produces more accurate and relevant responses for our use case, especially when it comes to parsing and SQL queries. The mini is still very affordable and should work well within our budget, while providing a better experience for our agent’s capabilities.
So you may deploy the gpt-5-mini model in your Azure Foundry first, and then update your .env file with the following line:
1

AZURE_OPENAI_DEPLOYMENT_NAME="gpt-5-mini"
Before you move on with the GitHub actions below, make sure that you have added the required secrets to your environment variables in GitHub, as described in last week’s class.
1. Menu scraper and GitHub Actions
- Make sure the scrape.py file in your project looks similar to the one in my GitHub repository, which you can find here:
scrape.py - Have Copilot create a new GitHub Actions workflow in your repository that runs the scraper every morning at 7am.
- Alternatively, you can copy my
.github/workflows/daily-scrape.ymlto the.github/workflowsfolder in your repository and modify it as needed.
- Alternatively, you can copy my
- Commit and push the changes to GitHub
- On github.com, go to the
Actionstab of your repository and check that the workflow is listed there. - Trigger the workflow manually for the first time to make sure it runs without errors
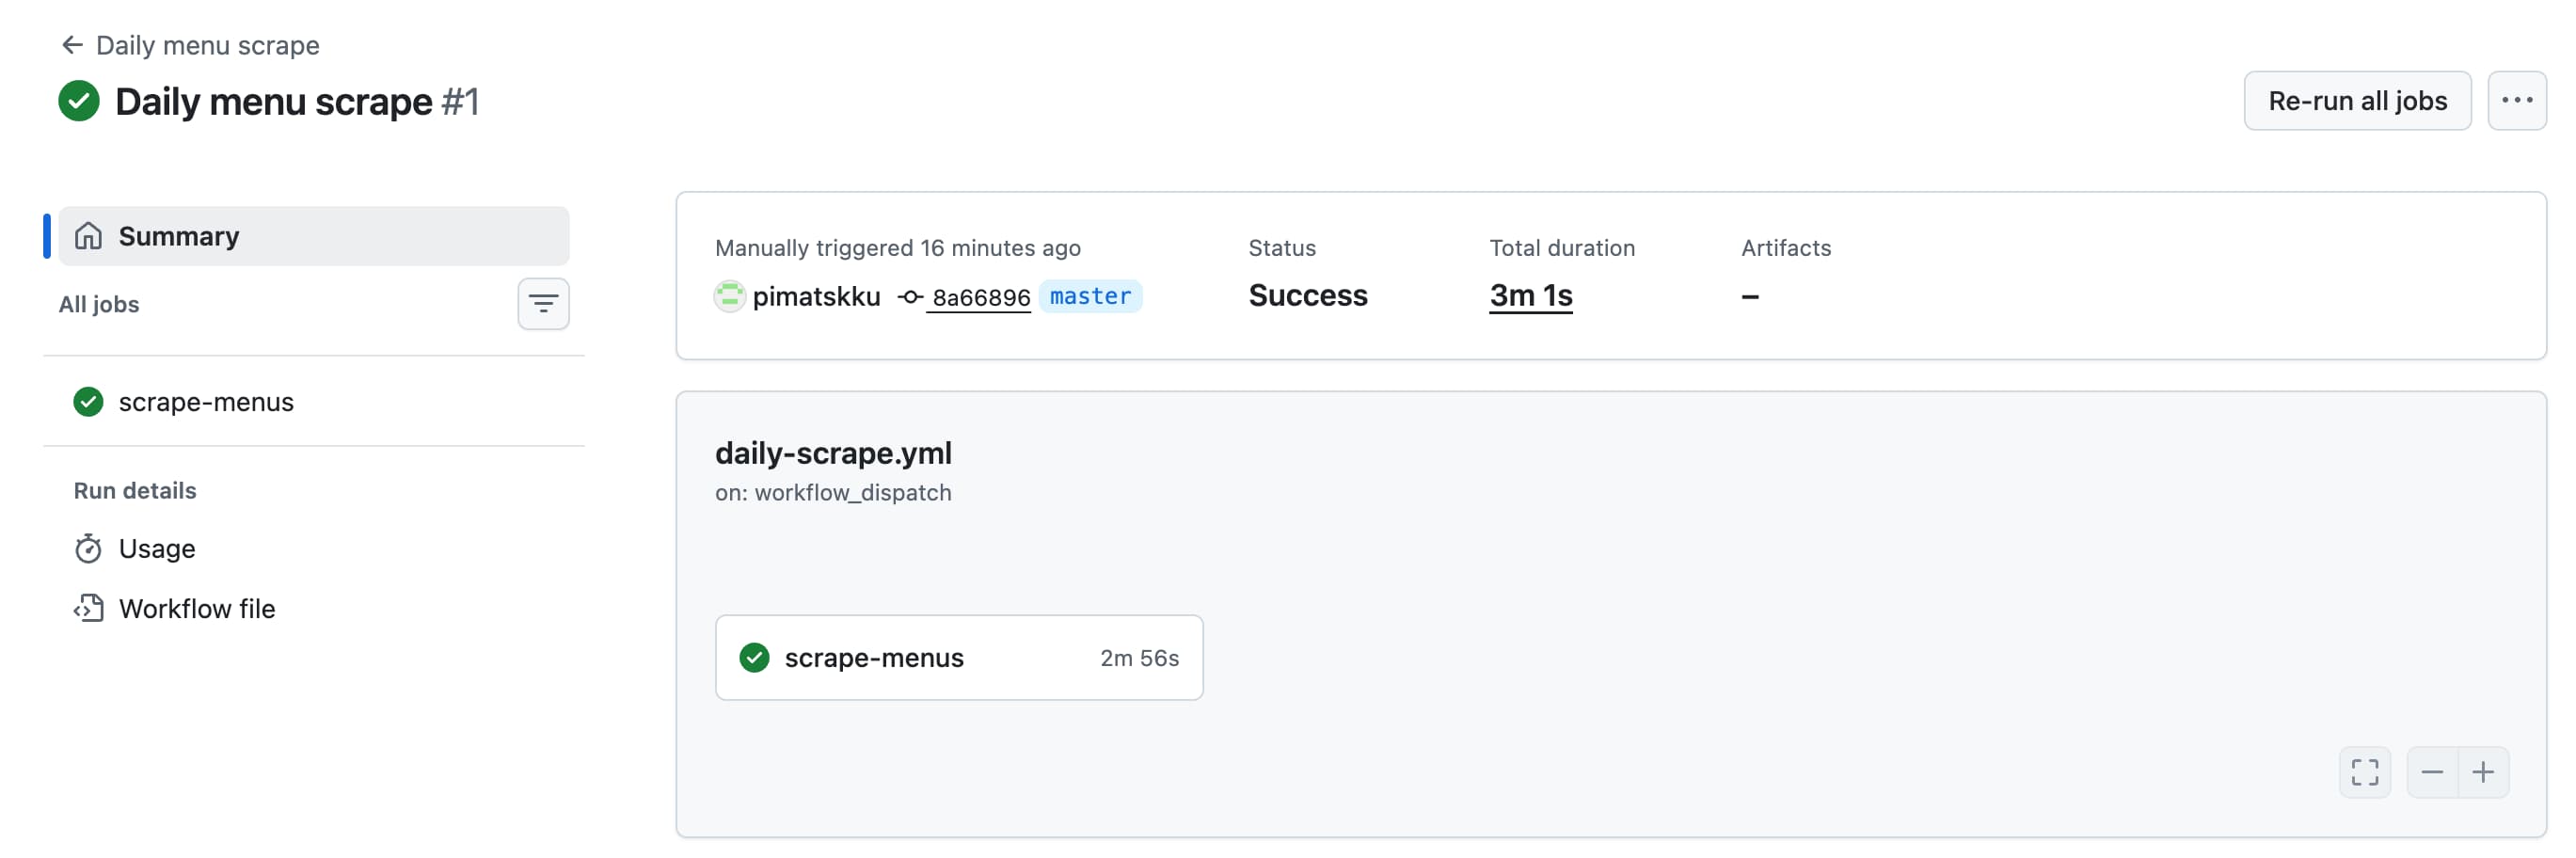 That’s what success looks like
If any errors show up in the workflow run, check the logs to see what went wrong. Common issues might be related to missing secrets, incorrect file paths, or issues with the scraper code itself. Fix any errors and try running the workflow again until it completes successfully. Of course you can ask Copilot for help if you get stuck!
After a successful run, check your Supabase database to see if the scraped data has been stored correctly.
- Go to the database in your Supabase dashboard
- Click on
Table editorin the left sidebar - Open the
scraped_html_snapshotstable - In the top filter bar, set the filter to
scrape_dateis2026-06-04(or the current date) and apply the filter
 scrape_date = 2026-06-04
Alternatively, you can use the SQL editor to run the query below in the SQL editor:
1
2

SELECT * FROM public.scraped_html_snapshots
WHERE scrape_date = '2026-06-04';
2. Parser, table creation, and GitHub Actions
To catch up with the parsed menu data from my previous runs, let’s create a ‘campus_menu_items` and populate it with the parsed data from my previous runs.
Create the table and insert historical data
- Make sure you have your table editor open in the Supabase dashboard
- To create the table for parsed menu items, run the SQL script found at supabase/create_menu_items_table.sql in the SQL editor of your Supabase dashboard. This will create a new table called
campus_menu_itemswith the appropriate structure to store the parsed menu data. - To fill the table with the parsed data from my previous runs, run the SQL script found at supabase/insert_menu_items.sql in the SQL editor. This will insert the parsed menu items from my previous runs into your
campus_menu_itemstable, so you can have some data to work with when we add the SQL tool to our agent.
Now check your campus_menu_items table in the table editor to see if the parsed menu items have been inserted correctly. You should see a list of around 350 menu items with their names, descriptions, dates, and other relevant information.
Add and test the parser
- Copy the parser code parse_menu_items.py from my GitHub repository into your project’s root directory
- Run the parser and examine the logs
- If the run was successful, check the
campus_menu_itemstable in your Supabase dashboard to see if the parsed menu items have been inserted correctly. You should see new entries for the current date with the parsed menu data.
 How many rows were inserted?
Add the parser to GitHub Actions
If time allows, you can also add the parser to your GitHub Actions workflow so that it runs automatically after the scraper. You can modify your existing workflow file (e.g., daily-scrape.yml) to include a step that runs the parser after the scraping step. Make sure to test the workflow again to ensure that both the scraper and parser run successfully and that the parsed data is stored in your Supabase database. Of course, you can ask Copilot to help you with this.
3. Add a SQL tool to the agent
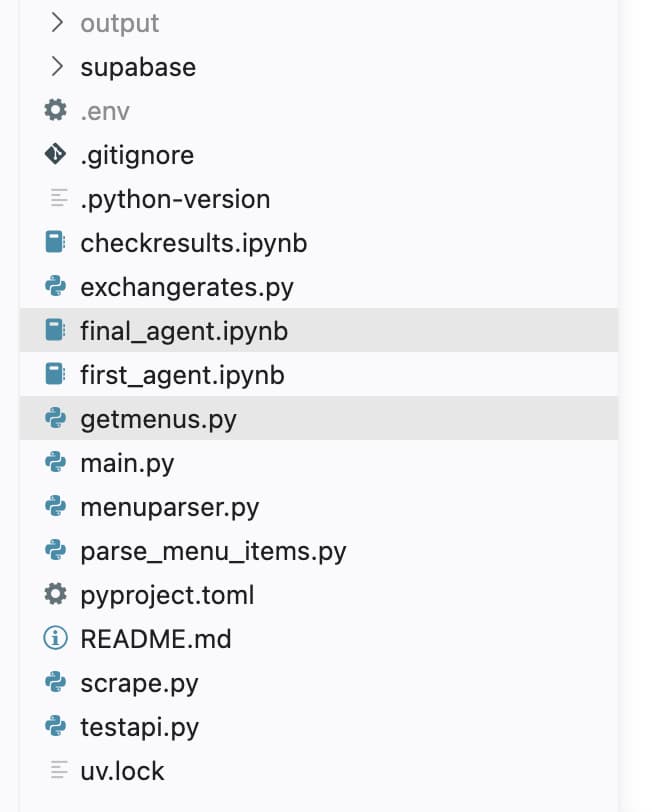
To speed things up I have vibe-coded the get_menu function before class, so you can copy the code from [getmenus.py] to your repository along with final_agent.ipynb which looks very similar to first_agent.ipynb but with the SQL tool added and tested. You can find both files in my GitHub repository:
- Copy the
getmenus.pyfile from my GitHub repository into your project’s root directory - Copy the
final_agent.ipynbfile from my GitHub repository into your project’s root directory - Open
final_agent.ipynband run the cells to test the agent’s ability to answer menu-related questions using the SQL tool that queries thecampus_menu_itemstable in your Supabase database
Curious what the Agent is doing behind the scenes when it receives a question about the menu? Check the logs in the
logs/directory to see the agent’s thought process, or check your LangSmith dashboard to see the agent’s actions and tool calls in real time!
4. Send the daily menu per email
This section is optional and can be skipped if you don’t have time, but it would be a nice finishing touch to have the agent email the daily menu to you automatically.
Create an SMTP2GO account and API key
- Go to https://www.smtp2go.com/
- Create a free account and verify your email address
- Login to the dashboard and add your @skku.edu email as a
Single sender email - Check your email for the verification email and click the link to verify
- In the dashboard go to
API Keysand clickAdd API Key - Copy the generated API key and add it as SMTP2GO_API_KEY in your
.envfile - Also add your @skku.edu email as
SMTP2GO_SENDER_EMAILin the.envfile - Back in the dashboard write a description for the API key and click
Add API Key
Now let’s add a very simple email sending function to our project:
Make sure your .env file has the following variables set:
1
2
3

SMTP2GO_API_KEY="api-YOURKEYHERE"
SMTP2GO_SENDER_EMAIL="your_verified_email"
SMTP2GO_RECIPIENT_EMAIL="where_you_want_to_receive_the_menu"
- Find the
Send an emailinstructions in the SMTP2GO API docs - In the upper right, click on
Copy page -
Select a cell or location in our project where you want to add the email function, ask Copilot to
Write a function that sends the agent's response as an html_body via SMTP2GO API to SMTP2GO_RECIPIENT_EMAIL from SMTP2GO_SENDER_EMAIL using the SMTP2GO_API_KEY found in the .env file. Don't forget to log every step in logs/ with loguru like the rest of the code. Refer to the following documentation:and paste the copied page into the prompt
Then, test the function. Did you get an email?
Convert the notebook into a python script
In order to run the script in GitHub Actions, we need to convert the final_agent.ipynb notebook into a python script. You can easily do this in Visual Studio Code:
- Open the
final_agent.ipynbnotebook in VS Code - In the upper right corner of the notebook editor, click on the
Exportbutton - Select
Export to Pythonfrom the dropdown menu - This will create a new file called
final_agent.pyin the same directory as the notebook - Open the
final_agent.pyfile and make sure it runs without errors